 Save
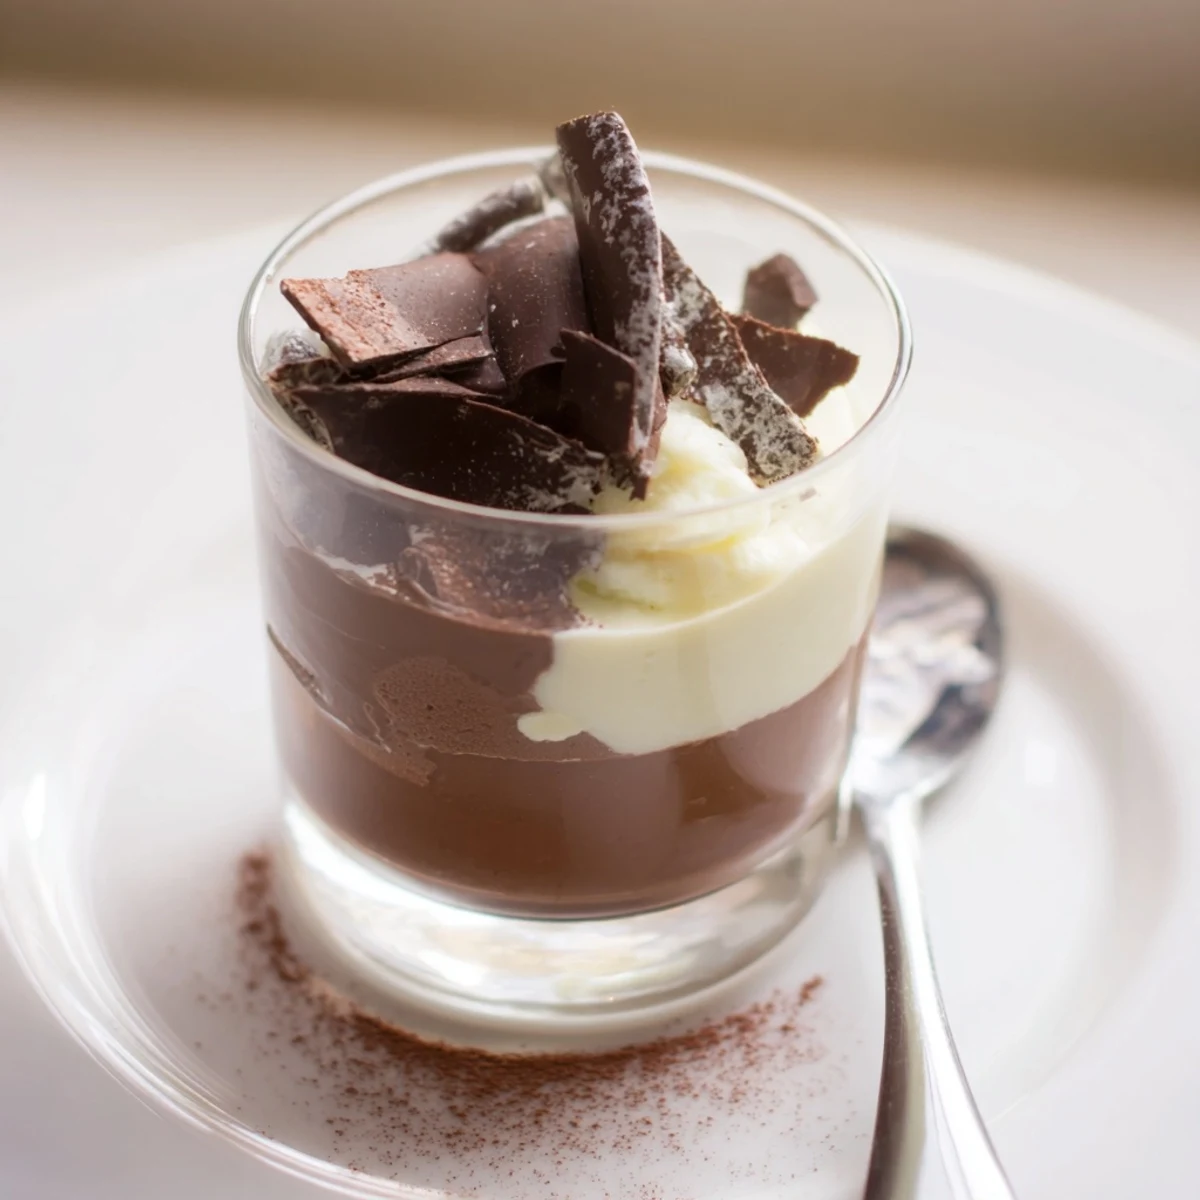
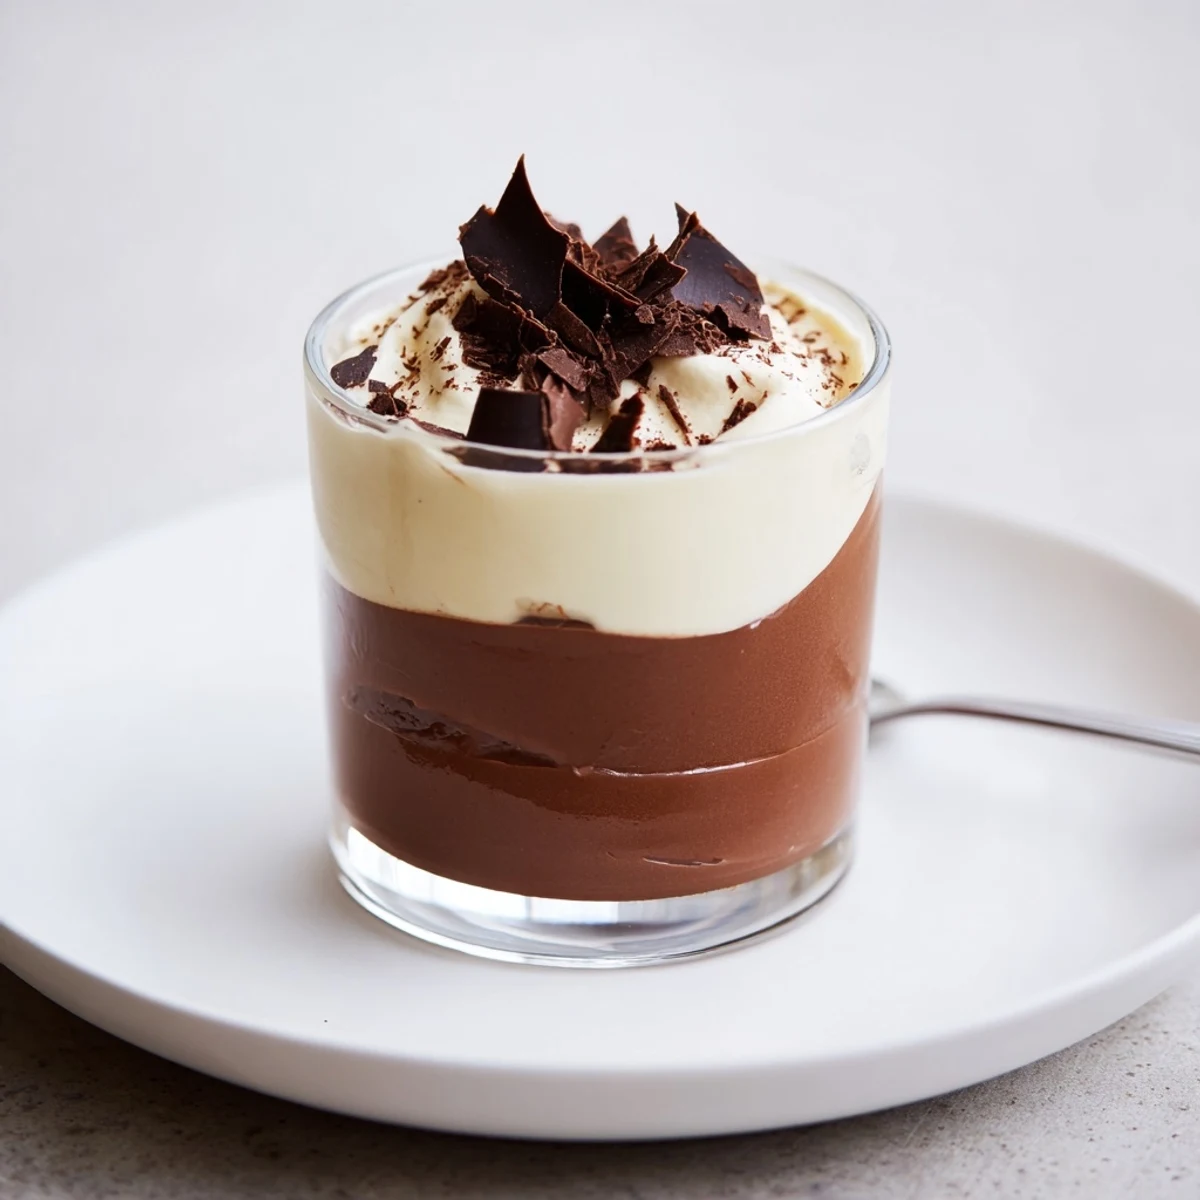
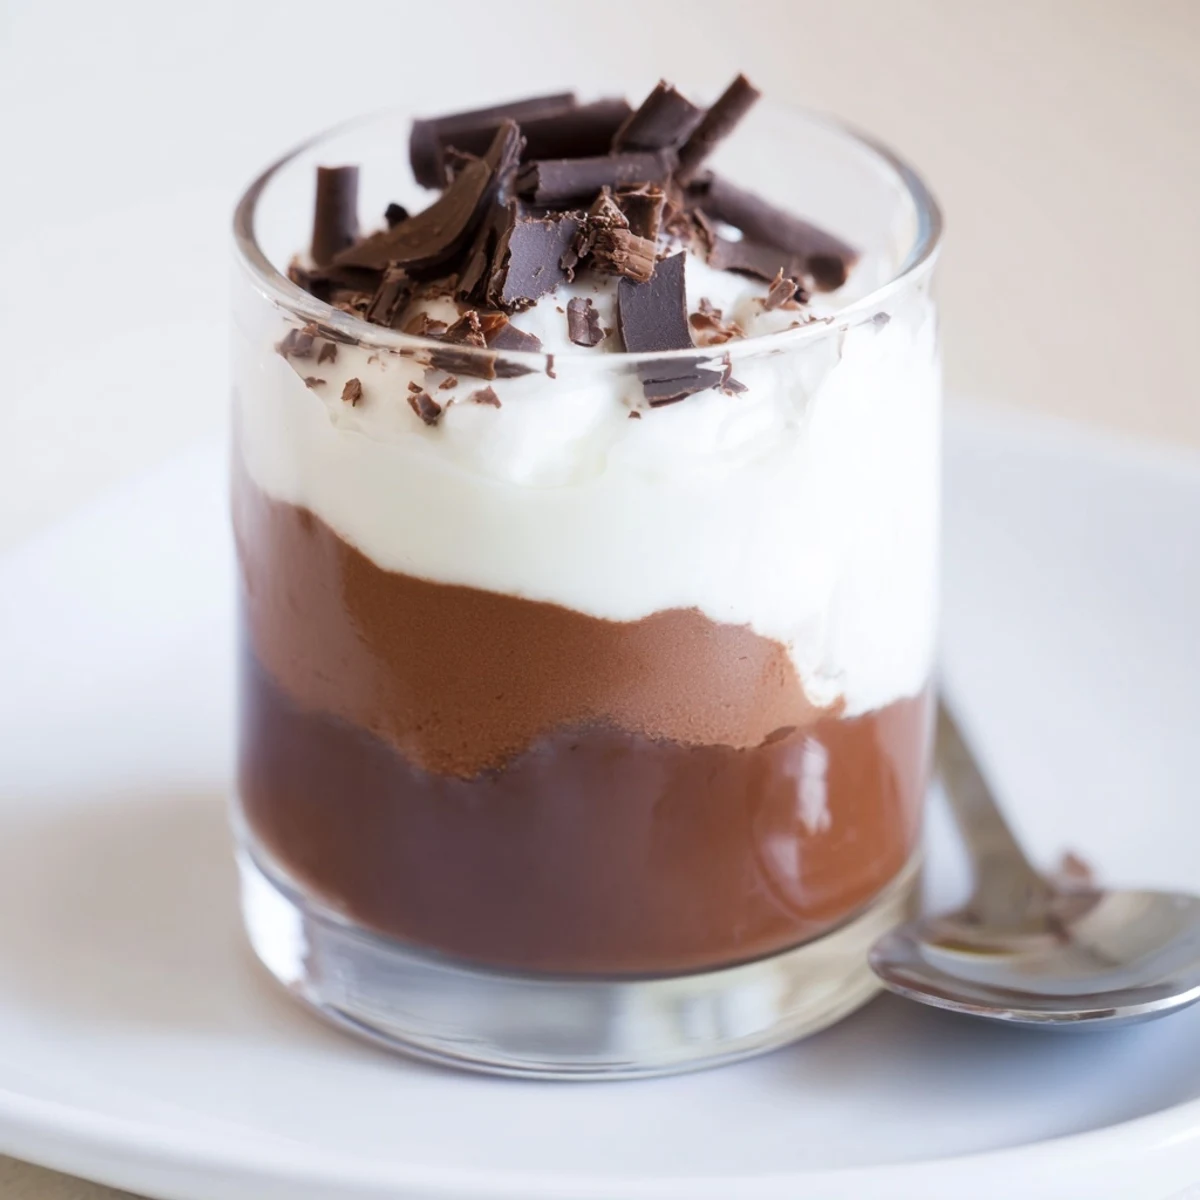
Save Layer dark, milk and white chocolate mousses in six small cups for a striking, indulgent finish. Melt each chocolate gently and let cool slightly; whisk egg yolks with sugar, fold in melted chocolate, then lift with softly whipped cream for lightness. Spoon or pipe layers, chilling between additions to preserve clean lines; a brief freezer step speeds setting. Finish with shavings or cocoa; serves six.
There are days when the only thing that will do is a dessert that feels like pure celebration, and Triple Chocolate Mousse Cups always fit the bill. When I first set out to conquer this recipe, it wasn't the complexity that called to me, but the promise of three distinct chocolate moments in every spoonful. The act of making them is almost meditative: chocolate melting, cream whipping, and silky layers settling into little glass cups. It's become a ritual for me before dinner parties, creating anticipation with each beautifully defined layer.
One wintry evening, I made these for friends visiting from out of town, and we laughed as our spoons clinked noisily against the glass, racing to see who could dig to the bottom layer first. I nearly forgot to serve them after a long meal, and the spontaneous joy over dessert made the night unforgettable. Now, whenever I see chocolate shavings scattered on my countertop, I recall that evening's happy chaos. These mousse cups have a way of turning dessert into a little adventure, no matter who you're with.
Ingredients
- Dark chocolate (100 g, minimum 60% cocoa): Choose a richly flavored chocolate bar for this bottom layer to give the cups a deep backbone, and chop it finely so it melts quickly.
- Milk chocolate (100 g): A creamy, gentle middle note that balances the darker and lighter layers; if you use high-quality milk chocolate, it won't turn out too sweet.
- White chocolate (100 g): Go for real white chocolate with cocoa butter for a smooth mousse that sits beautifully on top, adding sweetness and color contrast.
- Egg yolks (3, large): One for each layer — they help set the mousse and enrich the texture, but be extra careful not to scramble them when mixing with the warm chocolate.
- Sugar (4 ½ tbsp total): Enough to brighten each layer; use superfine sugar, which dissolves effortlessly for the most velvety result.
- Heavy cream (300 ml, cold): Whipped to gentle peaks, this transforms chocolate into airy mousse and helps each layer stay light and balanced.
- Shaved chocolate or cocoa powder (optional, for garnish): Save the prettiest chocolate curls or a dusting of cocoa for a festive finish — even coffee beans can give a little grown-up flair.
Instructions
- Melt and blend the chocolate:
- Melt each type of chocolate separately (start with dark, then milk, then white) using a bain-marie or in short microwave bursts, stirring until glossy and smooth. Let each chocolate cool a little before moving on, so it doesn't seize or scramble the yolks.
- Make the mousse base:
- Whip one egg yolk with 1 1/2 tablespoons sugar for each layer, whisking until it's pale and thick. Gently fold in the melted chocolate to create a silky, shiny mixture.
- Whip the cream:
- Using a cold bowl, whip 100 ml of heavy cream until soft peaks just form — this gives each mousse a gentle lift and avoids heaviness. Lightly fold the cream into the chocolate-yolk mix, being patient so you don't deflate the airiness.
- Layer the mousses:
- Spoon the dark chocolate mousse into the bottoms of 6 serving cups, creating an even base. Chill while preparing the milk chocolate mousse, then gently spoon or pipe it on top; repeat for the white chocolate layer and chill again for at least an hour until all layers are set.
- Finishing touches:
- Right before serving, add a scatter of shaved chocolate, a touch of cocoa powder, or your favorite garnish. Bring to the table chilled — and watch everyone dive in.
 Save
Save I once brought these mousse cups to a picnic in the park, wrapped carefully in a cooler; halfway through the afternoon, I noticed everyone had migrated to the shade, spoons in hand, smiling over chocolatey lips. That silly, sun-dappled moment turned this from a fancy dinner dessert to a memory everyone still asks about. There's joy in seeing these simple cups turn an ordinary day golden.
How to Get the Layers Picture-Perfect
I've found that using a piping bag or a small plastic zip bag with the corner snipped off helps aim each mousse layer right where you want it. Moving slowly is key; if you tilt the glass while piping, you'll get artistic lines, but most days, I prefer to see those even stripes glowing in the fridge. The chill between layers gives your spoons a satisfying resistance when you're finally ready to serve.
Small Mistakes That Make You a Better Cook
Once, I forgot to let my chocolate cool and ended up with a weird, lumpy mousse (it was still tasty, just not pretty). Another time, I grabbed the wrong bowl and accidentally whipped my egg yolks instead of the cream — what a mess! Every little mishap brings you closer to mastering the gentle fold and perfect set that really make these cups shine.
Making These Ahead and Serving with Flair
If you want to get ahead, these mousse cups hold up beautifully in the fridge for 24 hours, just cover them loosely so they don't pick up fridge flavors. They're honestly best served very cold, with just a minute or two out of the fridge before eating, so the textures are vivid and satisfying. Garnishes turn up the wow factor in seconds.
- You can freeze them for a firmer, ice cream-like treat — just thaw for 10 minutes before serving.
- If you're feeling festive, add a tiny splash of coffee liqueur to the dark chocolate layer (grown-up magic).
- Check your chocolate for sneaky allergens before serving, especially if guests have sensitivities.
 Save
Save Chocolate mousse, in three layers, always manages to turn heads and spark smiles. I hope these cups find a place at your most delightful gatherings, big or small.
Recipe Questions & Answers
- → How should I melt the chocolate to avoid burning?
-
Melt over a bain-marie or in short microwave bursts, stirring frequently. Keep water away from the chocolate and remove from heat as soon as it's mostly melted so residual warmth finishes the process.
- → How do I get light, airy mousse layers?
-
Whip the cream to soft peaks and fold gently into the chocolate mixture to retain air. Use a spatula and fold with wide strokes to preserve volume and a silky mouthfeel.
- → Can I speed up the setting between layers?
-
Yes — chill the cups in the refrigerator for 10–15 minutes between layers, or use the freezer for 20–30 minutes for a quicker set. Be cautious in the freezer to avoid over-chilling.
- → Is there a way to add extra flavor to the dark layer?
-
Stir in a splash of coffee liqueur or espresso for depth, or fold in a pinch of finely grated orange zest for brightness. Add delicate amounts so the texture stays balanced.
- → Can I omit eggs or use an alternative?
-
The yolks add richness and help emulsify melted chocolate. For an egg-free approach, use a stabilizer like gelatin or a cultured cream base adapted to provide similar body and sheen.
- → Any tips for neat, even layers?
-
Use a spoon or piping bag with a wide tip and hold the tip close to the surface when filling. Chill briefly after each layer to prevent mixing and keep crisp boundaries.
