 Save
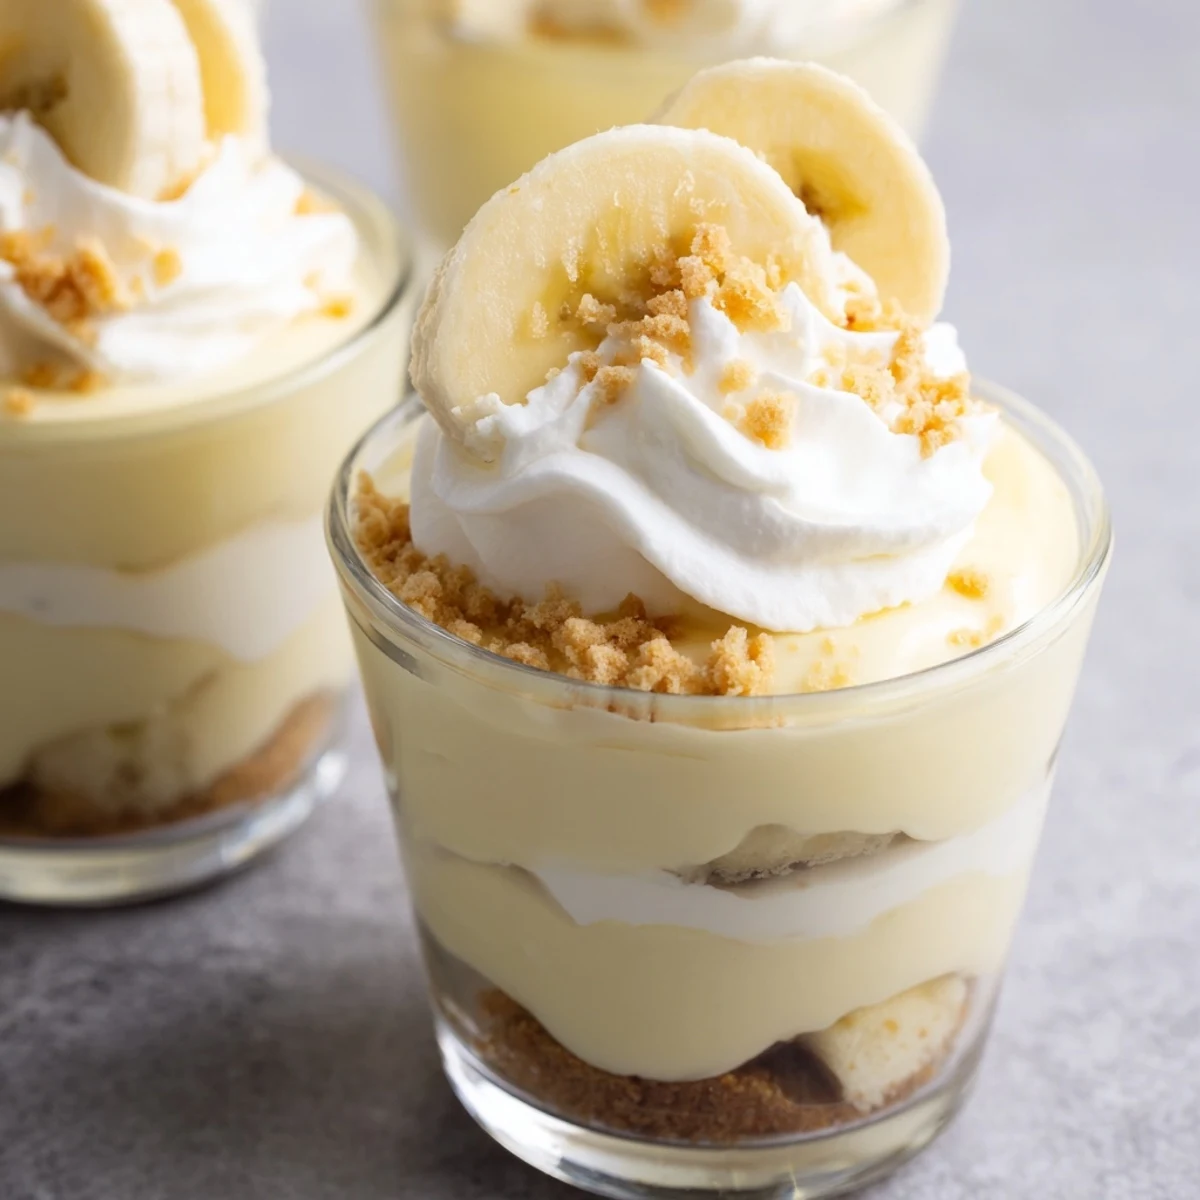
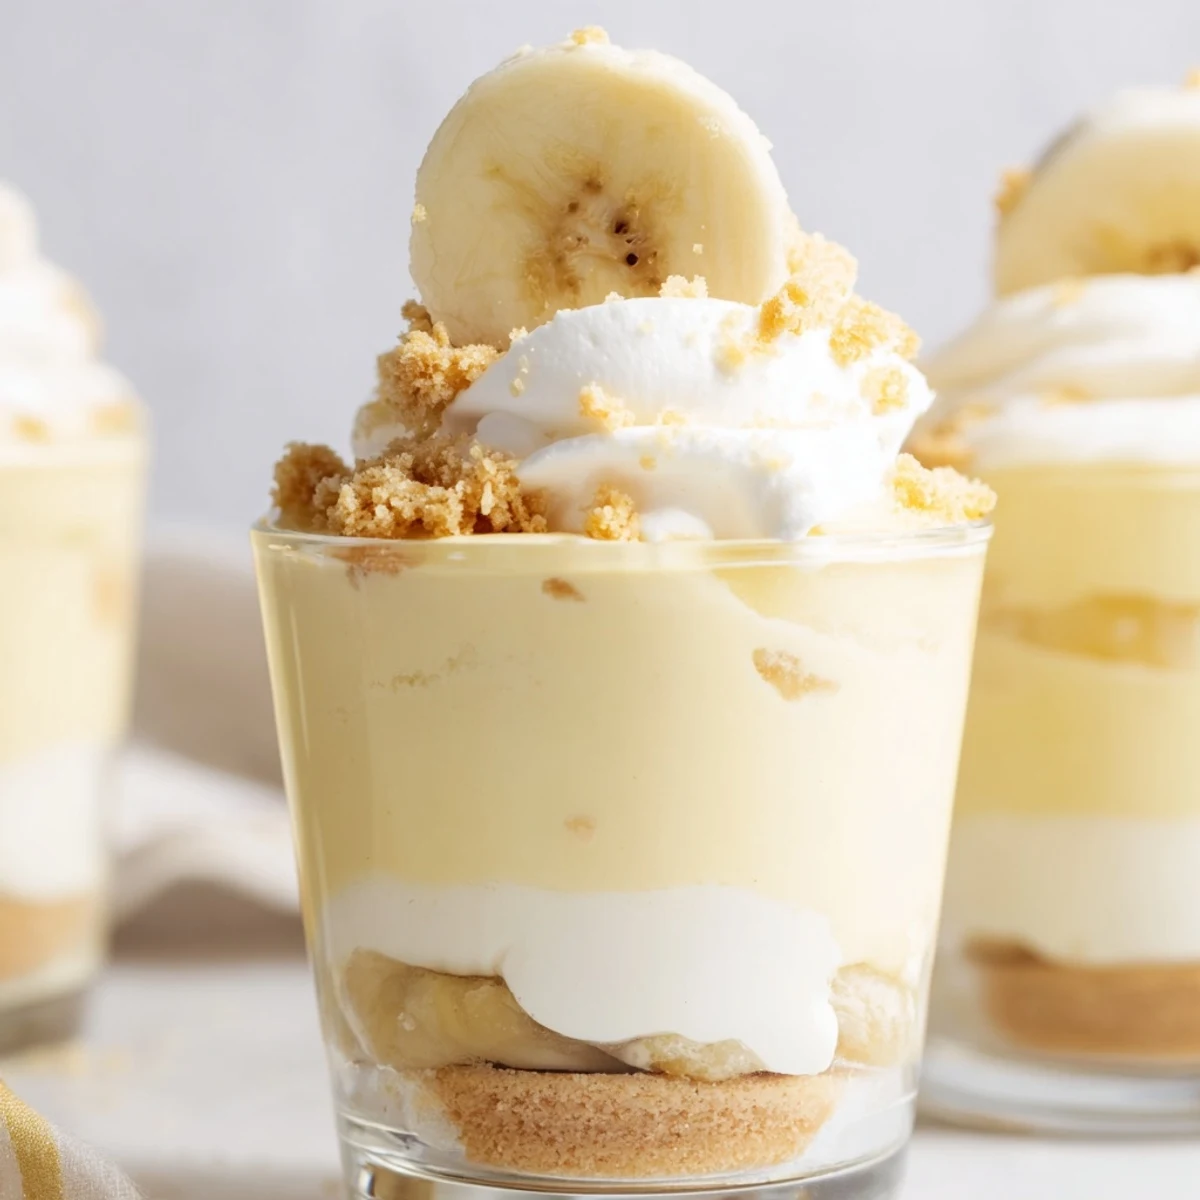
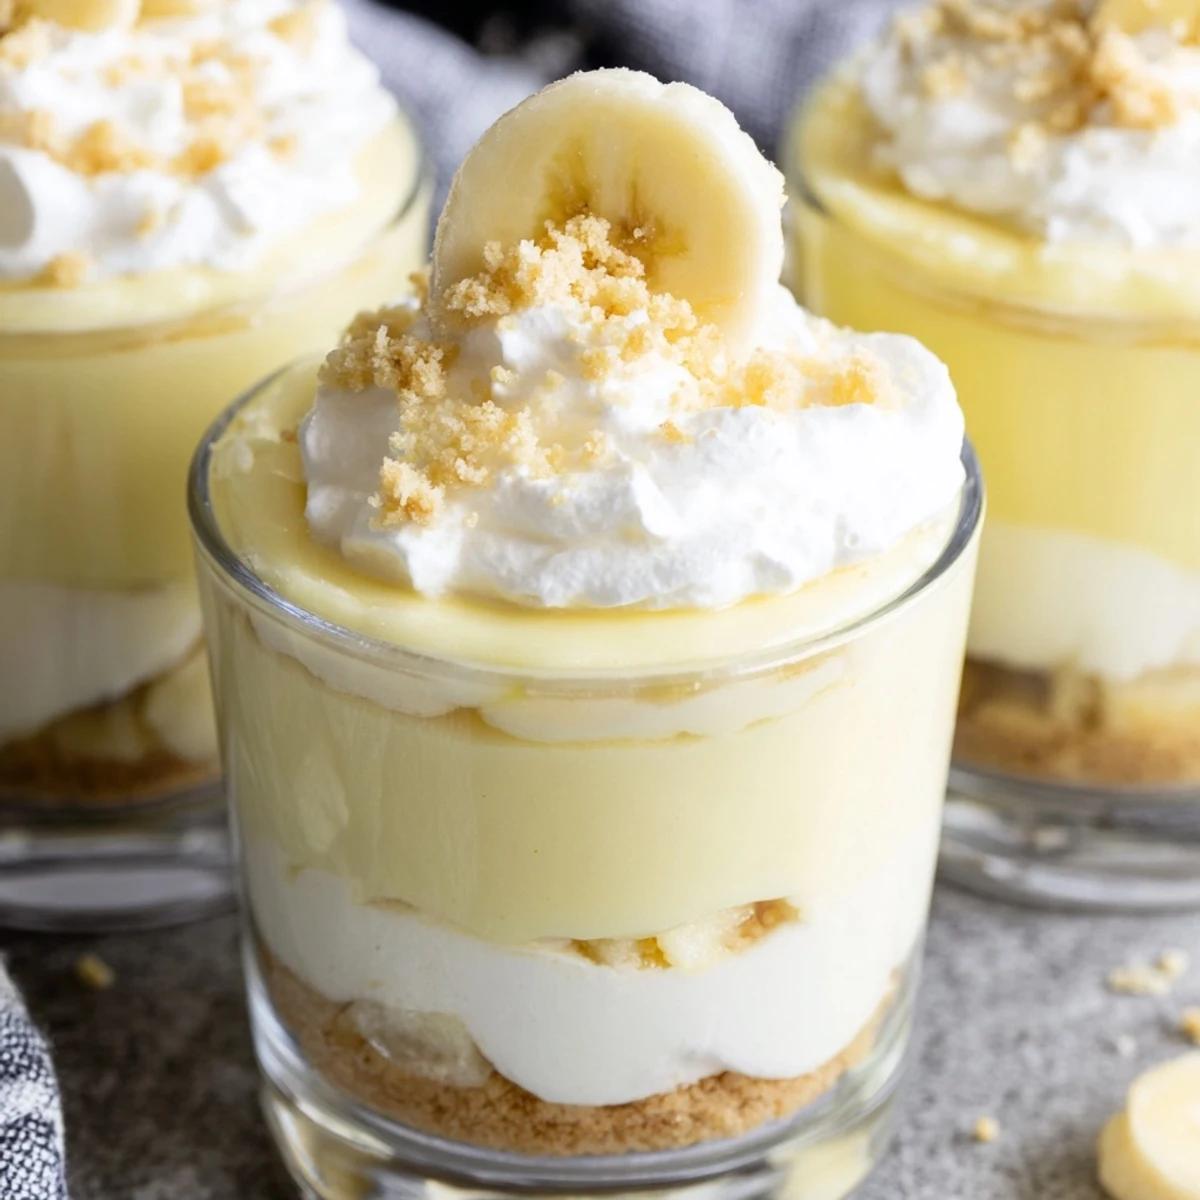
Save These individual no-bake dessert cups combine the rich creaminess of cheesecake with classic banana pudding flavors. Each serving features a buttery vanilla wafer crust, smooth cheesecake filling, luscious banana pudding layer, and generous toppings of fresh banana slices and crispy wafer crumbs. The entire assembly requires just 20 minutes of active prep time before chilling, making it an ideal make-ahead dessert for gatherings. The individual portions create an elegant presentation while eliminating the need for slicing or plating.
I stood in my kitchen at midnight, craving something sweet but refusing to turn on the oven during a July heatwave. That's when these cups happened—spooning layers into whatever glasses I could find, licking the beaters, and knowing I'd stumbled onto something magical before even taking the first bite.
My niece asked if she could help, and I watched her small hands carefully crushing wafers into a bowl. She took her job so seriously, pressing each crust down with determination, that I realized the best desserts are the ones that make you slow down and pay attention.
Ingredients
- 1 cup vanilla wafer cookies, crushed: These classic cookies create that nostalgic flavor we all remember from childhood puddings, and crushing them yourself means you control the texture from fine crumbs to satisfying chunks
- 2 tbsp unsalted butter, melted: Just enough to bind the crumbs together without making the crust greasy—salted butter works but adjust your recipe accordingly
- 8 oz (225 g) cream cheese, softened: Room temperature is non-negotiable here or you'll end up with lumpy filling instead of silky smooth perfection
- 1/3 cup granulated sugar: This amount hits the sweet spot without overpowering the delicate banana and vanilla flavors
- 1 tsp pure vanilla extract: Don't skimp—real vanilla makes the cheesecake layer taste like it came from a fancy bakery
- 1 cup heavy whipping cream, cold: The colder the cream, the faster it whips and the more stable your folded filling will be
- 1 (3.4 oz/96 g) package instant banana pudding mix: Instant is your friend here—it sets up beautifully without any stovetop time
- 1 1/4 cups cold whole milk: Whole milk creates the richest pudding layer, though 2% works if that's what you keep on hand
- 2 ripe bananas, sliced: Look for bananas with some brown spots—they're sweeter and blend better with the creamy layers
- Additional vanilla wafer crumbs: Save some crushed wafers for that essential textural contrast on top
- Fresh banana slices: These should be added right before serving to keep them from turning brown
- Whipped cream (optional): The crowning glory that makes these feel extra special
Instructions
- Build the foundation:
- In a small bowl, combine crushed vanilla wafers and melted butter until every crumb is coated and the mixture holds together when pressed. Spoon about 2 tablespoons into the bottom of each serving cup and press down gently with the back of a spoon to create an even crust layer.
- Craft the cheesecake base:
- Beat cream cheese, sugar, and vanilla extract in a medium bowl until completely smooth and no lumps remain—this takes about 2-3 minutes with a hand mixer on medium speed.
- Add the cloud factor:
- Whip cold heavy cream in a separate bowl until stiff peaks form, then gently fold it into the cream cheese mixture until fully combined and no white streaks remain.
- Prepare the pudding layer:
- Whisk together banana pudding mix and cold milk for exactly 2 minutes until noticeably thickened, then set aside while you start assembling.
- Begin layering magic:
- Layer half the cheesecake filling over the crust in each cup, using a small spoon or offset spatula to spread it evenly.
- Add banana slices:
- Arrange a single layer of sliced bananas over the cheesecake filling in each cup—this prevents the pudding from making them soggy.
- Add pudding layer:
- Spoon the prepared banana pudding over the banana layer, dividing it evenly among all cups.
- Top with remaining cheesecake:
- Add the remaining cheesecake mixture on top of the pudding layer, smoothing it carefully to keep the layers distinct.
- Finish with toppings:
- Sprinkle each cup with additional wafer crumbs, add fresh banana slices, and crown with a dollop of whipped cream if desired.
- Let them rest:
- Cover the cups and refrigerate for at least 2 hours—or up to 24 hours—so all the flavors meld together and the layers set properly.
 Save
Save These became my go-to contribution for every potluck after my friend's daughter specifically requested them for her birthday instead of a traditional cake. Something about having your own perfectly portioned dessert makes people feel special, and I love watching everyone dig in with their own spoon.
Making These Ahead
The beauty of these cups is they actually taste better after sitting overnight in the fridge. The crust softens just enough, the flavors meld together, and you can pull them out right before guests arrive looking like you spent hours when it really took about 20 minutes of active time.
Serving Suggestions
Clear glass cups or mason jars show off the beautiful layers and make these feel extra fancy. I've also used small mason jars as party favors, sending guests home with their own dessert—a tiny bit of luxury they didn't expect.
Easy Variations
Try swapping the vanilla wafers for graham crackers or even Nilla wafers with a dash of cinnamon for autumn vibes. During summer, a handful of fresh berries on top transforms these into something completely different while keeping that same creamy comfort.
- Chocolate lovers can stir cocoa powder into the cheesecake layer
- A splash of rum or bourbon in the pudding layer makes these decidedly adult
- Coconut whipped cream on top adds tropical flair that pairs beautifully with banana
 Save
Save There's something deeply satisfying about individual desserts, especially ones this creamy and nostalgic. Hope these become your midnight craving solution too.
Recipe Questions & Answers
- → Can I make these cups ahead of time?
-
Yes, these cups can be prepared up to 24 hours in advance. Simply assemble the layers, cover tightly, and refrigerate. Add fresh banana slices and whipped cream topping just before serving to prevent browning and maintain optimal texture.
- → How do I prevent the bananas from turning brown?
-
Toss sliced bananas lightly in lemon juice before adding them to the layers. Alternatively, add banana slices immediately before serving. The pudding and cheesecake layers also help protect the bananas from air exposure, slowing down oxidation.
- → What type of cups work best for this dessert?
-
Clear glass cups, mason jars, or parfait glasses work beautifully as they showcase the distinct layers. Aim for 6-8 ounce capacity vessels. The recipe yields 6 servings, so ensure you have enough individual containers for even portioning.
- → Can I substitute the instant pudding mix?
-
You can make homemade banana pudding using custard powder, cornstarch, and milk, though this will require cooking and cooling time. The instant mix provides convenience and consistent results for this no-bake preparation method.
- → How long should I whip the heavy cream?
-
Whip the cold heavy cream until stiff peaks form—this typically takes 3-5 minutes with a hand mixer. You'll know it's ready when the cream holds its shape when the beaters are lifted. Over-whipping can cause the cream to become grainy or separate.
- → Can I use graham crackers instead of vanilla wafers?
-
Yes, crushed graham crackers make an excellent crust substitute. Use the same ratio of 1 cup crumbs to 2 tablespoons melted butter. The flavor profile will shift slightly but still complements the banana and cheesecake layers beautifully.
