 Save
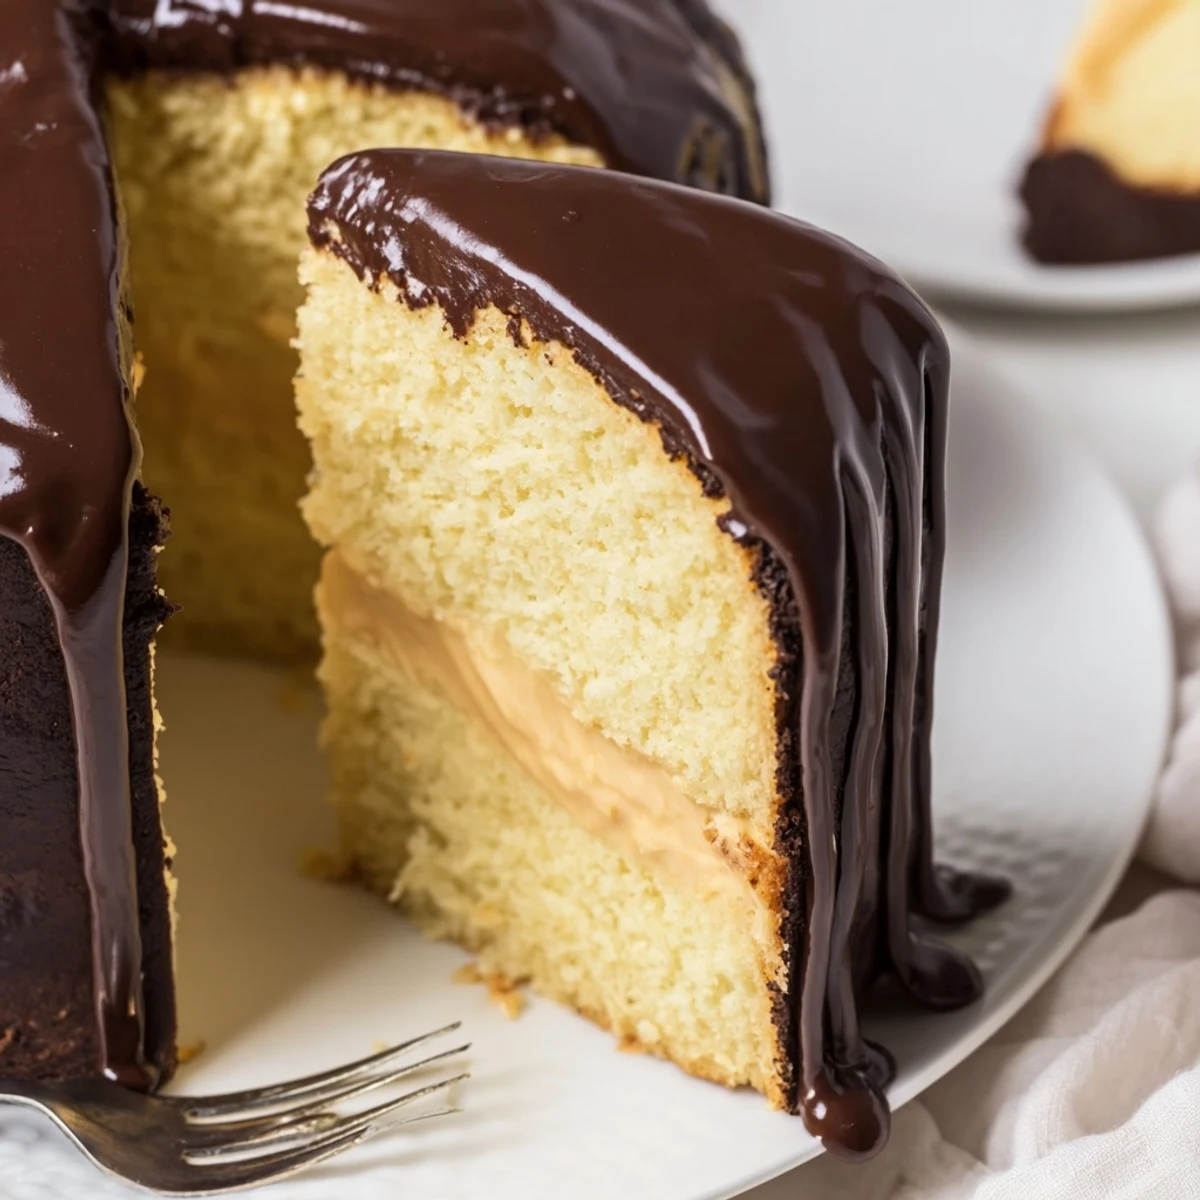
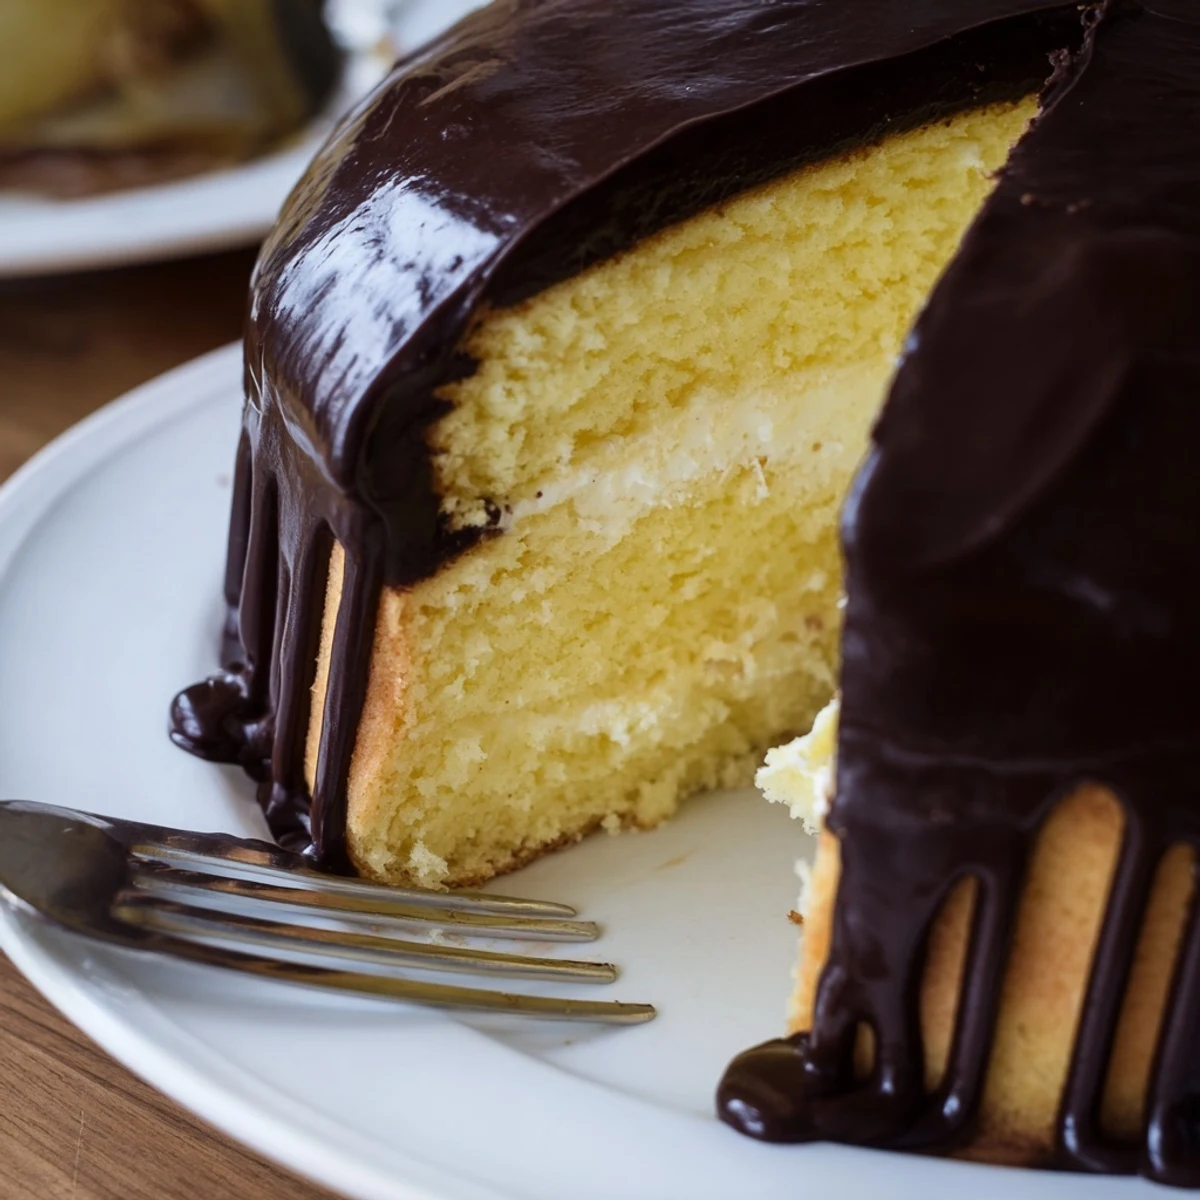
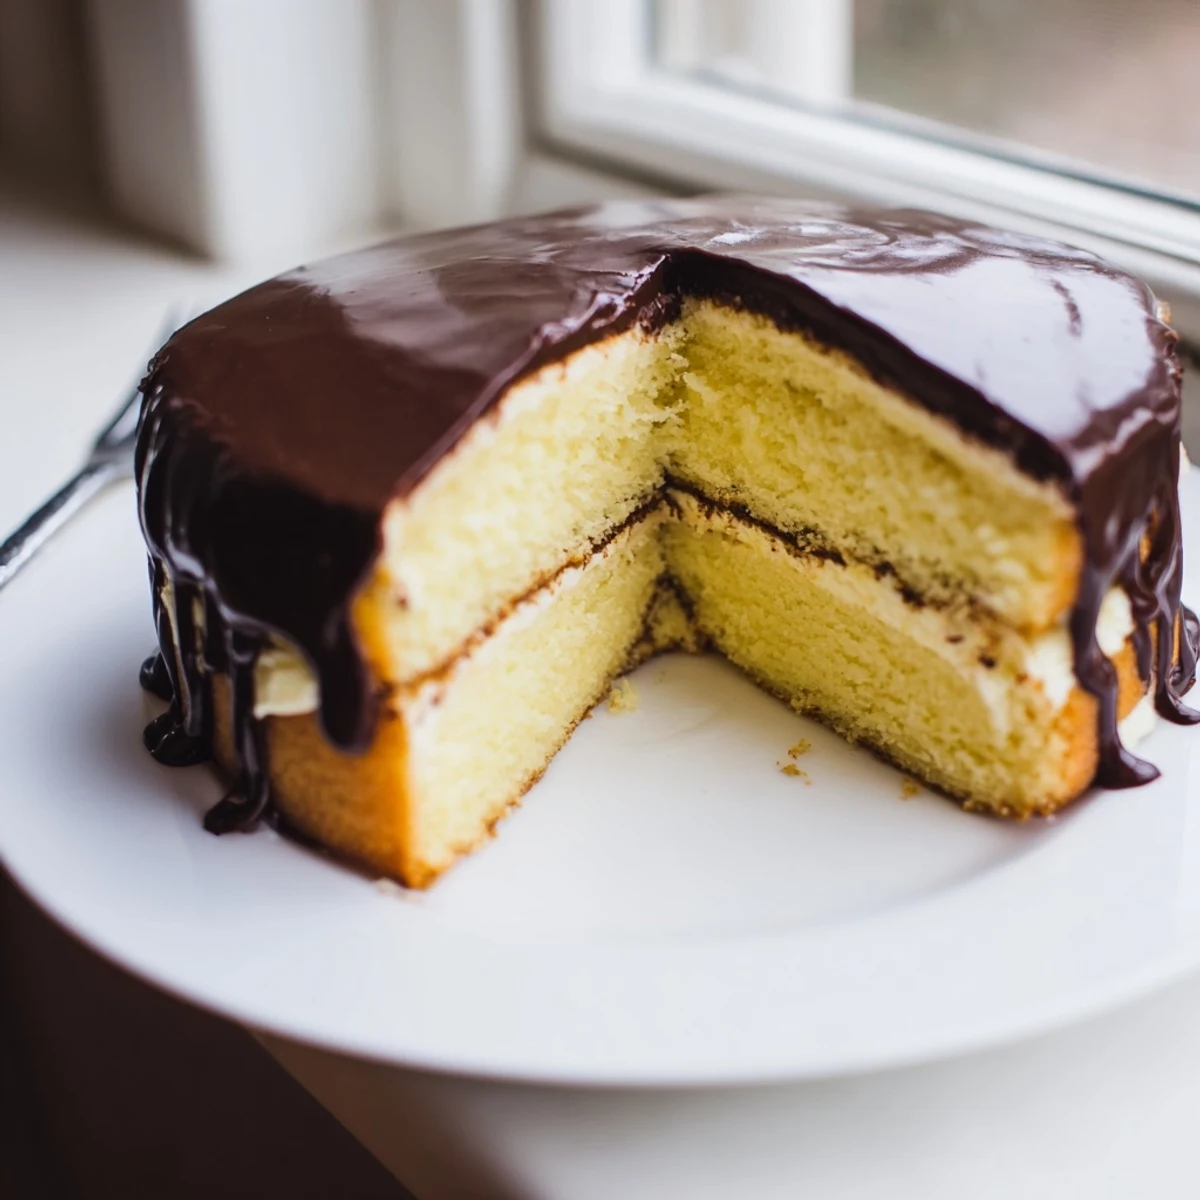
Save This traditional American dessert combines three essential elements: light and airy sponge cake, rich vanilla pastry cream filling, and a silky chocolate ganache topping. The cake provides a delicate base that holds up beautifully to the velvety custard, while the chocolate glaze adds the perfect finishing touch. Though called a pie, this treat is actually a layered cake that has graced American tables for generations.
Preparation involves baking two tender sponge layers, creating a stovetop pastry cream from egg yolks and milk, and finishing with a simple chocolate ganache. The assembly requires chilled components for the best results, ensuring clean layers and a stable presentation. Plan ahead as the pastry cream needs time to cool completely before assembly.
The first time I made Boston Cream Pie, I accidentally called it a cake in front of my New England born grandmother and she gently corrected me with a knowing smile. She told me how this dessert earned its pie name from the pie tins early Boston cooks used to bake the layers, and I've been in love with both the story and the taste ever since. There's something magical about cutting through that chocolate glaze and hitting the creamy custard center that makes every slice feel like a celebration.
I made this for my daughter's birthday last year and she asked if we could have it every year instead of a traditional frosted cake. The way her eyes lit up when she saw that glossy chocolate topping made all the careful stirring and waiting worth it. Now it's become our family's special request dessert for any milestone worth celebrating.
Ingredients
- 1 cup all purpose flour: Sift this with your baking powder and salt to prevent any lumps in your tender sponge layers
- 1 cup granulated sugar: Creaming this with eggs creates the structure that holds your cake together without heavy butter
- 4 large eggs: Room temperature eggs will whip up much fluffier and incorporate more air into your batter
- 1/4 cup whole milk: This adds moisture and richness to keep your sponge cake tender after baking
- 1/4 cup unsalted butter melted and cooled: Let this cool slightly so it doesn't cook your eggs when you fold it in
- 1 1/2 tsp baking powder: This gives your sponge the lift it needs without making it too dense
- 1/4 tsp salt: A pinch enhances all the flavors and balances the sweetness
- 1 tsp vanilla extract: Use pure vanilla for the best aromatic flavor in both cake and cream
- 2 cups whole milk for pastry cream: Whole milk creates the richest silkiest custard base
- 1/2 cup granulated sugar for pastry cream: This sweetens your custard without making it cloyingly sweet
- 4 large egg yolks: These create the luxurious creamy texture that makes pastry cream so special
- 1/4 cup cornstarch: This thickens your custard perfectly and gives it that classic velvety mouthfeel
- 2 tbsp unsalted butter for pastry cream: Whisk this in at the end for an extra silky finish
- 4 oz semisweet or bittersweet chocolate: Choose good quality chocolate since the glaze is so prominent
- 1/2 cup heavy cream: Heavy cream creates that gorgeous pourable ganache consistency
- 1 tbsp unsalted butter for ganache: This gives your chocolate topping that beautiful glossy shine
Instructions
- Prepare your cake pans:
- Preheat your oven to 350°F and generously grease two 8 inch round pans with butter then dust with flour.
- Mix your dry ingredients:
- Sift together flour baking powder and salt into a medium bowl then set aside.
- Whip the eggs and sugar:
- Beat eggs and sugar until pale and thick about 5 minutes. The mixture should ribbon when you lift the beaters.
- Fold in the flour:
- Gently fold the flour mixture into the egg mixture just until combined. Use light strokes to keep all that air you whipped in.
- Add the milk and butter:
- Mix milk and melted butter together then fold into your batter until smooth.
- Bake the cake layers:
- Divide batter between your prepared pans and bake for 22 to 25 minutes until a toothpick comes out clean.
- Start the pastry cream:
- Heat milk in a saucepan until just simmering while whisking yolks sugar cornstarch and salt in a separate bowl.
- Temper the eggs:
- Slowly pour hot milk into your yolks while whisking constantly then return everything to the pot.
- Thicken the cream:
- Cook over medium heat whisking constantly until thick and bubbling about 2 to 3 minutes.
- Finish and chill the pastry cream:
- Remove from heat whisk in butter and vanilla then cover with plastic wrap touching the surface and chill completely.
- Make the chocolate ganache:
- Heat heavy cream until simmering then pour over chopped chocolate and butter. Let sit 2 minutes then stir until smooth and glossy.
- Assemble your Boston Cream Pie:
- Place one cake layer on your serving plate spread with cold pastry cream top with second layer then pour chocolate over the top letting it drip down the sides.
- Chill before serving:
- Refrigerate for at least 1 hour to set the ganache and make slicing easier.
 Save
Save Last Thanksgiving I brought this to my in laws house and my father in law who rarely eats dessert went back for a second slice. He told me it reminded him of the bakery trips his family used to take on Sunday mornings. Making those kinds of connections through food is exactly why I love baking.
Making Ahead Like A Pro
You can bake the cake layers up to two days ahead and wrap them tightly in plastic wrap at room temperature. The pastry cream actually benefits from being made a day ahead since the flavors have time to meld and deepen. Just give it a good whisk before spreading to restore that silky smooth texture.
Getting That Perfect Chocolate Drip
The trick to the picture perfect ganache drip is all about temperature. Let your ganache cool for about 10 minutes after stirring until it feels like warm honey. If it's too hot it will pour right off your cake but too cool and it won't drip down the sides in those gorgeous ribbons.
Serving And Storage Secrets
This dessert actually tastes best when served slightly chilled since the pastry cream firms up beautifully and contrasts perfectly with the soft cake. I like to take it out of the fridge about 15 minutes before serving so the chocolate softens just a bit.
- Use a sharp knife dipped in hot water and wiped clean between slices for the cleanest cuts
- Store any leftovers covered in the refrigerator for up to 3 days though it rarely lasts that long
- The assembled cake freezes well for up to 1 month if you wrap it tightly in plastic then foil
 Save
Save Every slice of this Boston Cream Pie carries a little bit of American baking history and a whole lot of joy. Hope it becomes a treasured recipe in your kitchen too.
Recipe Questions & Answers
- → Why is it called a pie if it's a cake?
-
The name comes from 19th-century terminology when pie and cake were often used interchangeably. Boston cream pie was created at the Parker House Hotel in Boston, and the original name has persisted despite being a layered cake with cream filling and chocolate topping.
- → Can I make Boston cream pie ahead of time?
-
Yes, this dessert actually benefits from being made a day ahead. The flavors meld together beautifully, and the pastry cream sets up properly. Store in the refrigerator, covered loosely, and bring to room temperature for about 30 minutes before serving for the best texture.
- → What's the difference between pastry cream and pudding?
-
Pastry cream is made with egg yolks and cooked on the stovetop until thickened, creating a rich, custard-like texture. Pudding typically uses cornstarch as the primary thickener and lacks the egg yolk base. Pastry cream holds its shape better in layered desserts and has a more luxurious mouthfeel.
- → How do I prevent the ganache from sliding off the cake?
-
Ensure both the cake layers and pastry cream are completely chilled before assembly. The cold pastry cream will be firmer and provide a stable base. Pour slightly cooled ganache over the center and let it spread naturally—don't use a spatula to push it toward the edges, which can cause it to slide.
- → Can I freeze Boston cream pie?
-
While possible, freezing isn't recommended as the texture of the pastry cream can become grainy and the chocolate ganache may develop sugar bloom. For best results, enjoy within 2-3 days when stored properly in the refrigerator. The cake layers can be baked and frozen individually before assembly if needed.
- → Why did my sponge cake turn out dense?
-
Dense sponge cake usually results from overmixing the flour or deflating the egg-sugar mixture. When folding in the flour, use gentle motions and stop as soon as no dry streaks remain. Also, ensure your eggs are at room temperature—they'll whip up lighter and hold more air, creating the tender texture you want.
