 Save
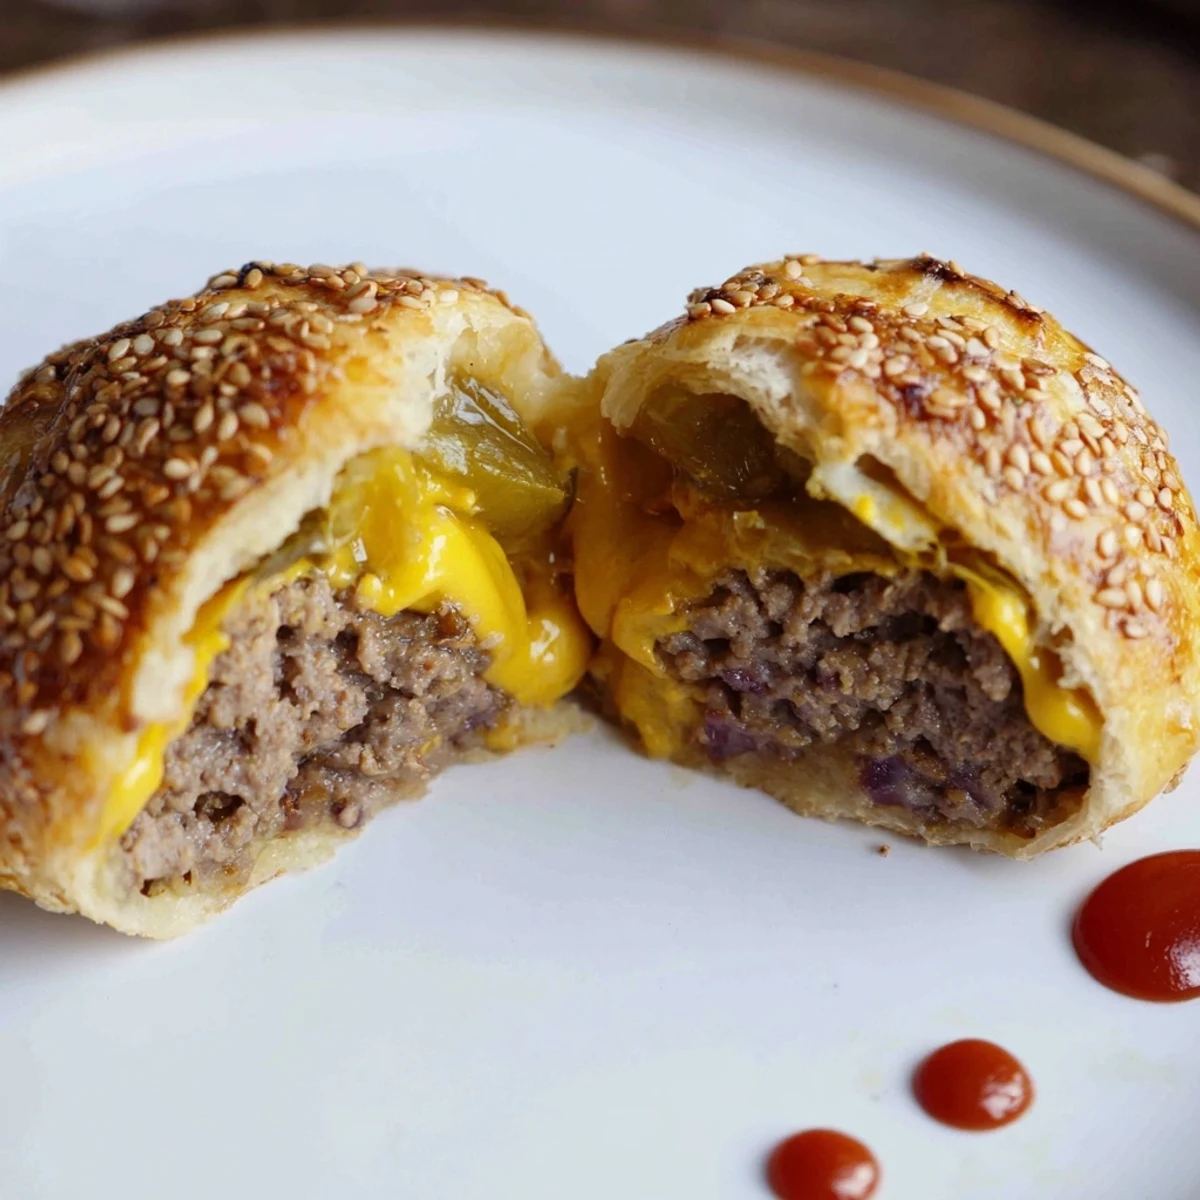
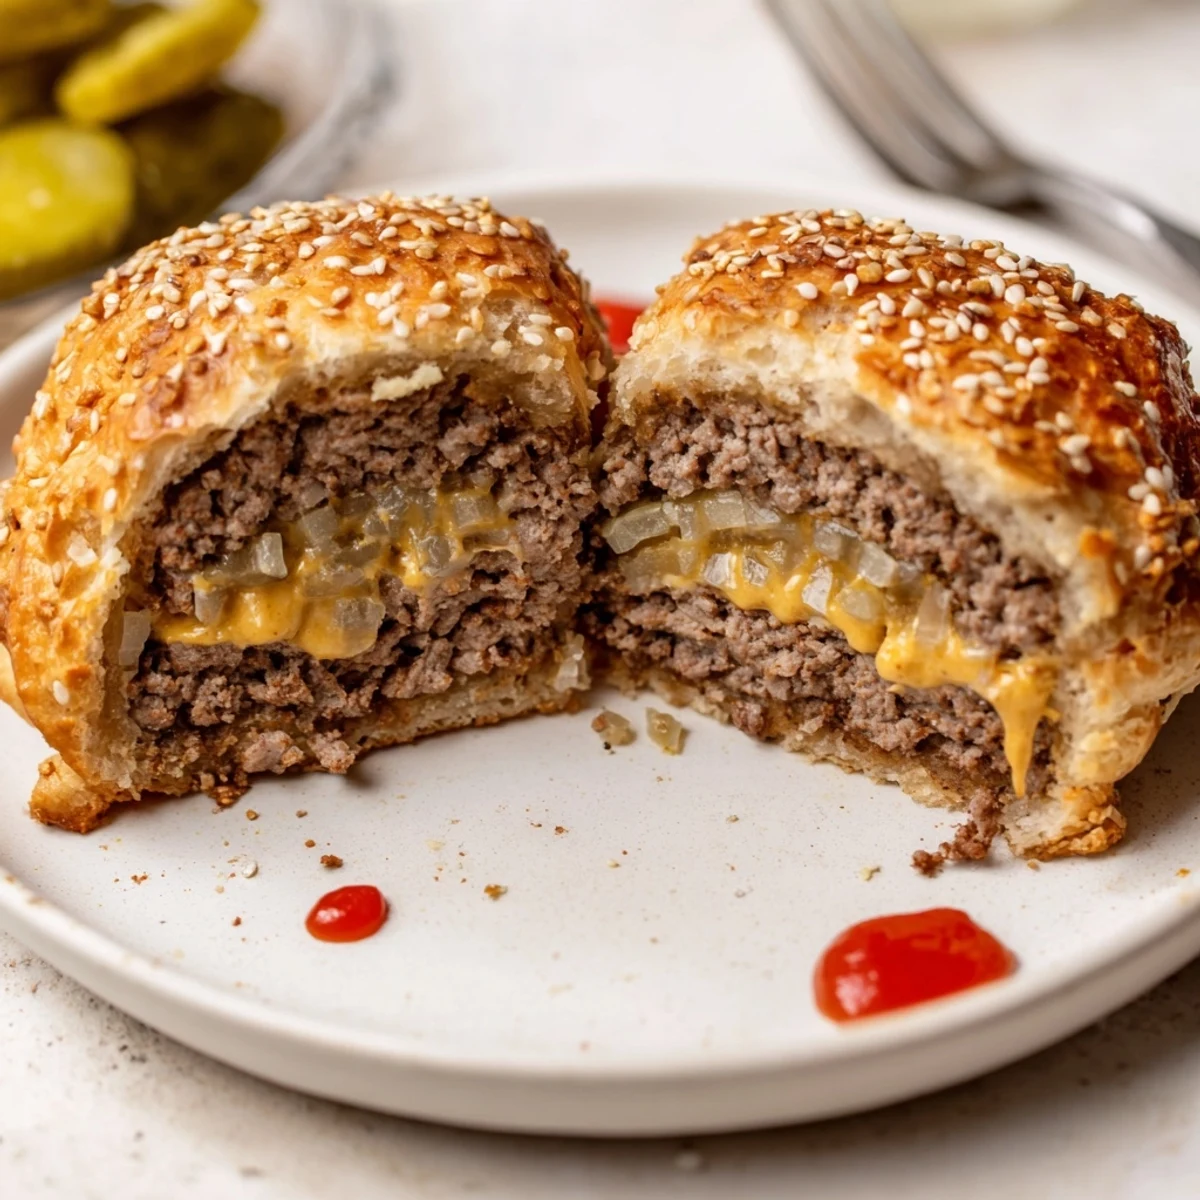
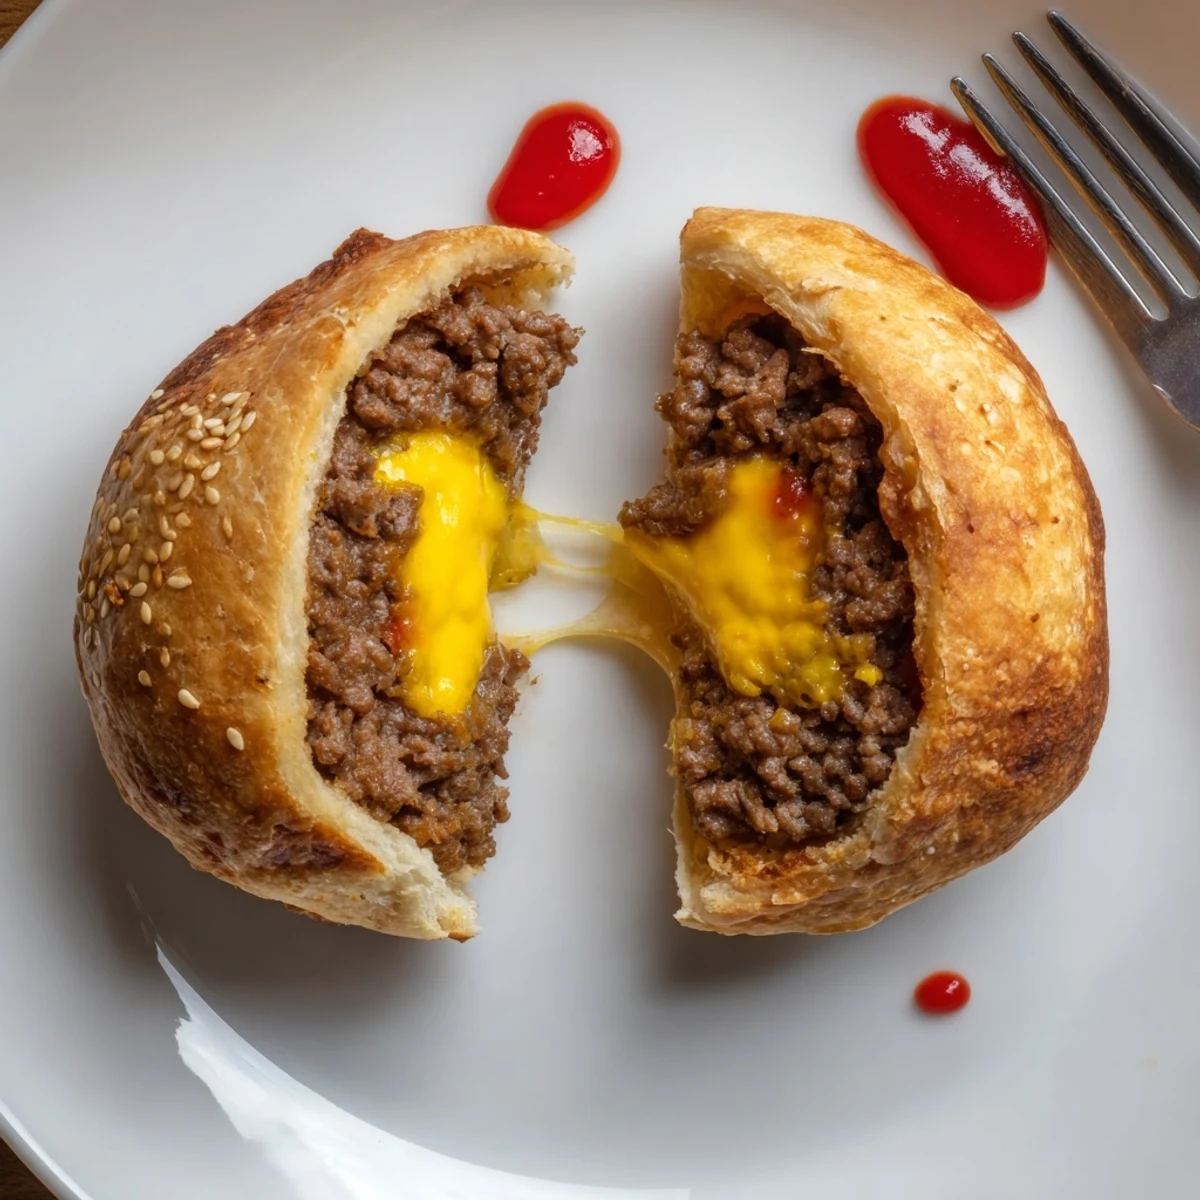
Save These golden biscuit-wrapped cheeseburger bombs are built by cooking seasoned ground beef with onion, ketchup, mustard and Worcestershire, then tucking a spoonful and a cube of mozzarella into flattened biscuit rounds with shredded cheddar. Seal tightly, brush with egg wash, sprinkle sesame seeds and bake at 200°C (400°F) until deep golden, 15–18 minutes. Let rest briefly before serving; swap pepper jack for heat or add bacon for extra smoke.
On one boisterous weekend, with kitchen music thumping and friends lounging nearby, I found myself craving the nostalgia of street burgers but hoping for something a bit more playful. The aroma of golden biscuits mingled with sizzling beef created a scent that made everyone peek around the corner with curiosity. It’s not often you see people getting excited over the oven, but once these Cheesy Cheeseburger Bombs started baking, anticipation was thick in the air. They promised a gooey, savory surprise in every bite, and they absolutely delivered.
Last summer during a backyard game night, I whipped these up on a whim thinking they’d be casual finger food, but everyone hovered around the tray as soon as the oven timer chimed. Even the so-called picky eaters couldn't resist, passing around dipping sauces, and laughing about whose cheeseburger bomb had the most cheese escape. It turned into one of those evenings where the food brought everyone closer together, no matter how competitive the board games got.
Ingredients
- Ground beef: Letting the beef cook with onions and seasoning really boosts the savory factor; draining fat is essential for that perfect filling.
- Shredded cheddar cheese: The sharper the cheddar, the more flavor explodes in each bite—don’t be shy to grate your own for meltier results.
- Mozzarella cheese cubes: A cube tucked in the center guarantees that cheese-pull moment and a creamy contrast to the cheddar.
- Onion: Finely diced and sautéed, it sweetens the meat mixture without overpowering.
- Pickle (optional): Adds a tangy, classic burger bite; if you’re a diehard pickle lover, don’t skip it.
- Refrigerated biscuit dough: Fast, forgiving, and reliably bakes up tender and golden—make sure to seal the edges well.
- Ketchup, mustard, Worcestershire sauce: This trio infuses all the essential burger tang and umami; mix them in after browning for balanced flavor.
- Garlic powder, salt, black pepper: These round out the filling and give it that familiar comfort note of a backyard burger.
- Egg (for wash): A quick brush makes sure your bombs bake up glossy and appealing.
- Sesame seeds: The toasty topping making each bomb look and feel like a mini burger bun.
Instructions
- Get set to bake:
- Preheat your oven to 200°C (400°F) and line your baking sheet with parchment so nothing sticks— it’s worth the minimal prep.
- Sauté your onions and beef:
- Toss the onions into a skillet over medium heat and listen for that gentle hiss; once soft, add beef, garlic powder, salt, and pepper, breaking up the meat until browned.
- Build burger flavor:
- Stir in ketchup, mustard, Worcestershire, and pickles, then take a moment to taste—everything should smell intensely savory and inviting.
- Shape the biscuit bases:
- Flatten each biscuit round in the palm of your hand, trying not to tear the dough; a thin but sturdy base wraps best.
- Fill and stuff with cheese:
- Add a spoonful of beef mix and cheddar on each, then nestle a mozzarella cube in the center like a hidden treasure.
- Seal the edges:
- Carefully fold the dough up and over the filling, pinching to close and rolling lightly until you have a tidy, round bomb.
- Finish with flair:
- Place seam side down, brush with egg, and sprinkle on sesame seeds so they toast as they bake.
- Bake until golden:
- Slide into the oven for 15-18 minutes until you get golden, puffy tops, then cool just enough to grab—molten cheese inside, hot!
 Save
Save There was a rainy evening when we huddled in the kitchen—the power flickered, and by the glow of the oven, these cheeseburger bombs turned an ordinary night into something memorable. Someone dubbed them ‘the happiest surprise in bread,’ and I don’t think any boxed delivery ever got close.
The Art of Sealing the Perfect Bomb
Closing up these biscuit rounds might seem simple, but a gentle, patient pinch along every edge is the real trick. Rushing it only creates weak spots—slow down, press, then roll gently to ensure a fully sealed, leak-free bomb. This tiny detail keeps the cheese where you want it: inside and gooey.
Swapping in Your Favorite Cheeses
If sharp cheddar isn’t your top pick, try Monterey Jack, gouda, or a little pepper jack for attitude; I even snuck a smoky cheese inside one batch, and it disappeared first from the plate. Each cheese brings its own melt and flavor explosion, so don’t be afraid to mix things up next time you reach for the fridge.
Sauces and Dipping Ideas That Make It Pop
Nothing beats the dunk: classic ketchup, tangy burger sauce, or even a spicy mustard are always a hit, but ranch or sriracha mayo have jolted my crowd into happy silence before. Serve a few ramekins and watch the bombs vanish faster than you expect.
- Sprinkle a little smoked paprika on top for color and depth.
- Use parchment instead of foil for ultra-easy cleanup.
- Let them cool at least five minutes so the cheese stays put.
 Save
Save Cheesy Cheeseburger Bombs turn a simple night into something to talk about tomorrow. Whether you snack, share, or savor in secret, they're impossible not to love.
Recipe Questions & Answers
- → How do I keep the filling from leaking?
-
Dry the cooked beef slightly and cool it a few minutes before filling. Use a small spoonful, pinch dough firmly at the seams, and press edges together to create a tight seal. Chilling filled balls briefly helps them hold shape during baking.
- → Which cheeses melt best inside?
-
Soft, melty cheeses like mozzarella and shredded cheddar work best together—mozzarella for gooey center and cheddar for flavor. Pepper jack adds heat, while cubed cheese gives a satisfying molten core.
- → My biscuits brown too quickly—what should I do?
-
If tops brown before centers are done, lower oven to 180°C (350°F) and lengthen bake time, or tent with foil for the last 5–8 minutes to prevent overbrowning while finishing the interior.
- → Can I make them ahead or freeze them?
-
Assemble and freeze on a baking sheet until firm, then transfer to a bag. Bake frozen, adding 6–10 minutes to the time and covering if browning too fast. Cool leftovers and refrigerate up to 3 days or freeze up to 1 month.
- → Any tips for adding extra flavor?
-
Mix cooked bacon bits into the beef, swap cheddar for pepper jack for spice, or fold finely chopped pickles into the filling for tang. A light brush of melted butter after baking boosts shine and richness.
- → How should I reheat leftovers for best texture?
-
Reheat in a 175–180°C (350°F) oven for 8–10 minutes to restore crisp exterior and melted interior. Avoid microwaving alone, which can make the dough soggy—use a quick oven finish after a brief microwave if short on time.
