 Save
Save Create bakery-quality brioche rolls at home with this French-inspired method. These soft, golden breads feature a rich buttery flavor and tender, pillowy texture that melts in your mouth. The dough incorporates generous amounts of butter and eggs for that classic brioche decadence, while a two-stage rising process ensures perfect lightness. Brush with egg wash for that beautiful glossy finish. Ready in under three hours with active prep around thirty minutes. These versatile rolls complement both sweet spreads like jam and honey, as well as savory dishes. Freeze extras for later enjoyment—simply wrap tightly once cooled.
There's something almost meditative about brioche dough, the way it transforms from shaggy and resistant to silk and satin under your patient attention. I learned this on a rainy Sunday when I decided homemade rolls would somehow fix everything wrong with the week, and surprisingly, they kind of did.
My roommate walked in midway through the first rise, caught me literally checking on the dough like it was a sleeping baby, and immediately asked what time dinner was being served. That's the thing about warm bread smells, they're basically an unspoken invitation.
Ingredients
- All-purpose flour: The foundation, though bread flour gives extra chew if you prefer more structure
- Granulated sugar: Feeds the yeast and contributes to that golden crust we're chasing
- Instant dry yeast: Skip the proofing step and go straight to mixing, saving precious morning minutes
- Fine sea salt: Balances the richness and keeps the sweetness in check
- Large eggs: Room temperature eggs incorporate better, so set them out while you gather everything else
- Whole milk: Lukewarm feels comfortably warm to your wrist, not hot enough to kill the yeast
- Unsalted butter: Softened and cubed means each piece incorporates evenly without leaving greasy pockets
- Egg wash: That glossy finish comes from one beaten egg with a splash of milk
Instructions
- Mix the dry foundation:
- Combine flour, sugar, yeast, and salt in your stand mixer bowl, giving it a quick whisk to distribute everything evenly before the wet ingredients join the party.
- Bring dough together:
- Add eggs and lukewarm milk, mixing on low until you see a rough, shaggy dough forming that's starting to cling to the dough hook.
- Incorporate the butter:
- With mixer on medium, drop in butter cubes one at a time, letting each disappear completely before adding the next, then knead for 8 to 10 minutes until the dough pulls away from the bowl sides and feels satiny smooth.
- First rise:
- Transfer dough to a lightly greased bowl, cover with plastic wrap or a clean towel, and tuck it somewhere warm for 1 to 1.5 hours until it's doubled in size.
- Shape the rolls:
- Punch down gently, divide into 12 equal pieces, and tuck the edges under each piece to form smooth, tight balls that will bake up beautifully round.
- Second rise:
- Arrange rolls in a greased 9x13-inch pan or on a lined baking sheet with slight space between them, cover again, and let rise for 45 to 60 minutes until puffy and touching.
- Prepare for baking:
- Preheat oven to 175 degrees C while you whisk together the egg and milk for the wash.
- Add the golden finish:
- Brush the tops gently but thoroughly with egg wash, being careful not to deflate the risen dough.
- Bake to perfection:
- Bake for 18 to 22 minutes until deeply golden brown and the rolls sound hollow when tapped on the bottom.
- Serve warm:
- Let cool for just a few minutes before tearing into the first one while still steaming.
 Save
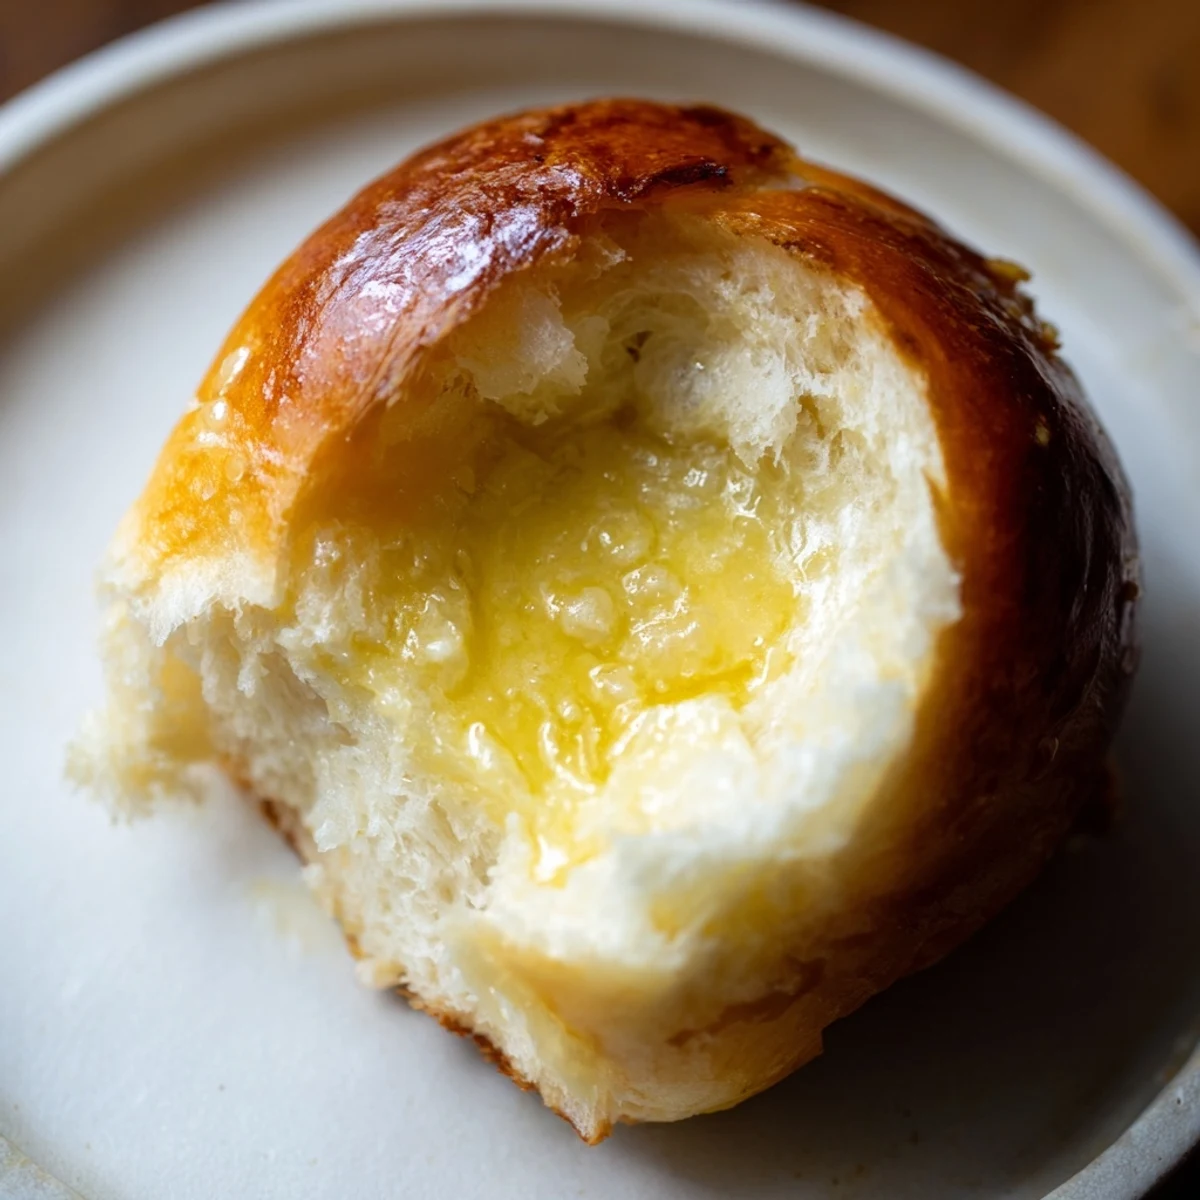
Save These became my go-to contribution to family gatherings after my sister took one bite and immediately cancelled her dinner bread order. Nothing makes you feel like a kitchen magician quite like pulling homemade brioche out of the oven.
The Secret to Shine
Egg wash is what gives bakery bread that professional gloss, but apply it gently after the final rise so you don't deflate all your hard work. A soft pastry brush works better than a stiff one.
Timing Wisdom
Brioche dough is incredibly forgiving and can actually do a slow rise in the refrigerator overnight if that works better with your schedule. The longer, colder rest develops even more flavor.
Serving Ideas
These rolls earn their place at any table, from holiday dinners to weekend breakfast spreads. Leftovers make incredible French toast or bread pudding the next morning.
- Split and toast for breakfast with butter and jam
- Use for slider buns at your next gathering
- Freeze cooled rolls in freezer bags for up to three months
 Save
Save There's honest joy in pulling apart a still warm roll, steam rising between your fingers, butter melting into the crevices. Some things in the kitchen are worth every minute.
Recipe Questions & Answers
- → What makes brioche different from regular bread?
-
Brioche contains high amounts of butter and eggs, creating a richer, softer texture with a golden color. The fat content gives it that distinctive tender crumb and subtle sweetness that sets it apart from leaner breads.
- → Can I make these without a stand mixer?
-
Yes, though kneading by hand will take longer. Mix ingredients in a bowl, then turn onto a floured surface and knead for 15-20 minutes until smooth and elastic, incorporating butter gradually.
- → Why must ingredients be room temperature?
-
Room temperature eggs and milk incorporate more evenly into the dough, while softened butter blends smoothly during kneading. Cold ingredients can hinder yeast activation and create uneven texture.
- → How do I know when the dough has doubled?
-
Gently press two fingers into the dough—if the indentation remains and doesn't spring back, it's ready. The dough should feel puffy and light, roughly twice its original volume.
- → Can I prepare the dough ahead of time?
-
Absolutely. After the first rise, punch down and refrigerate overnight in a covered bowl. Let it come to room temperature for 30 minutes before shaping and proceeding with the second rise.
- → What if I don't have a 9x13 pan?
-
Use any baking sheet lined with parchment paper, spacing the rolls 2 inches apart. They'll spread slightly during baking and may have crispier edges without the pan sides.
