 Save
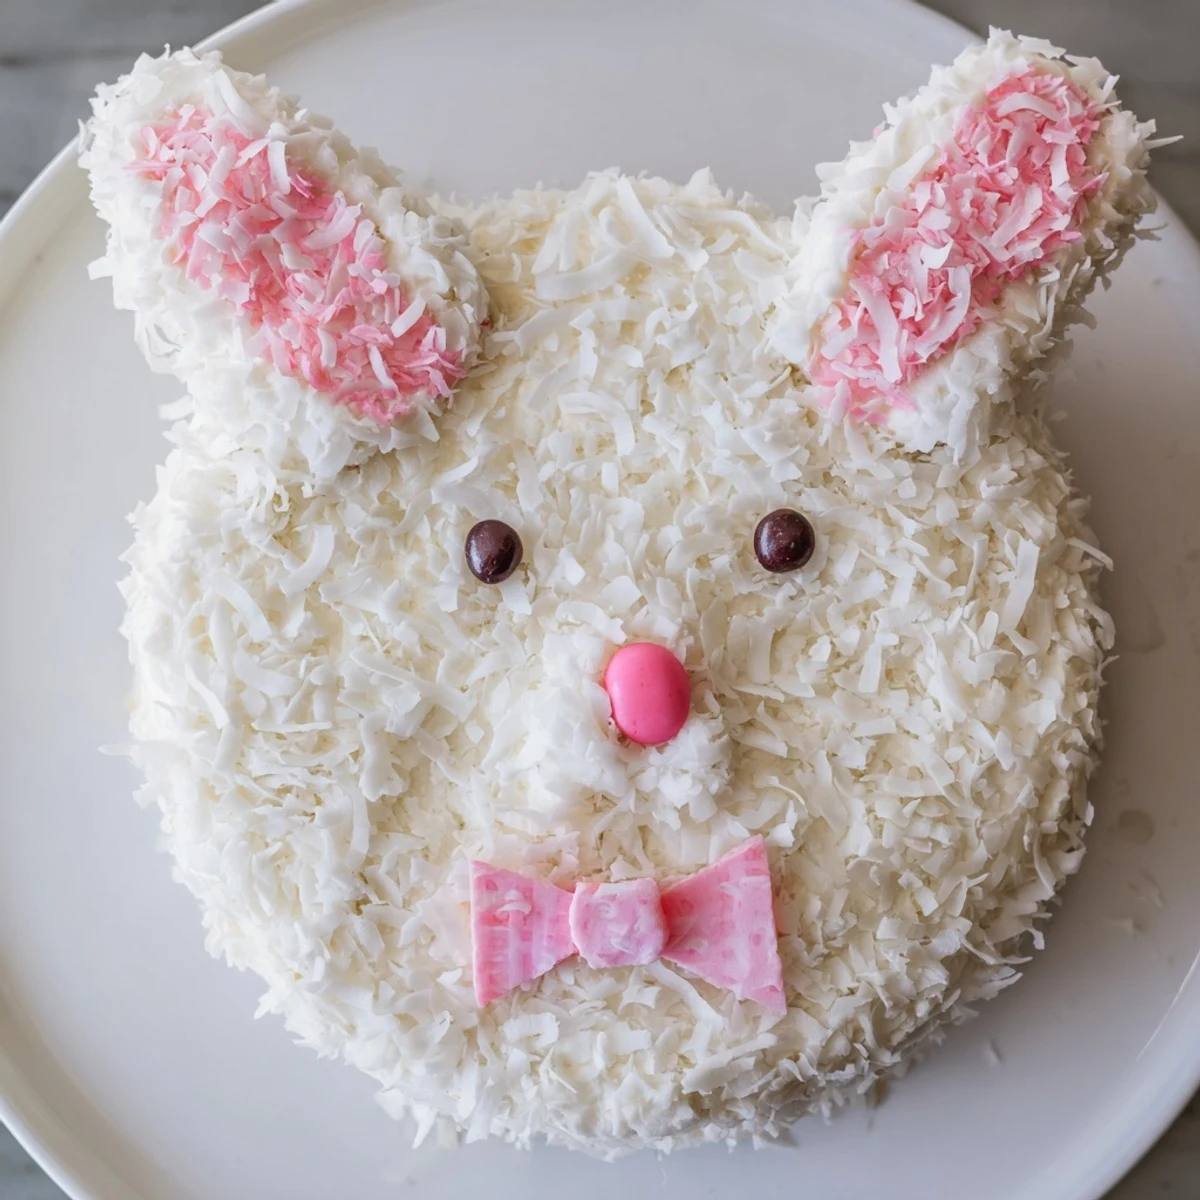
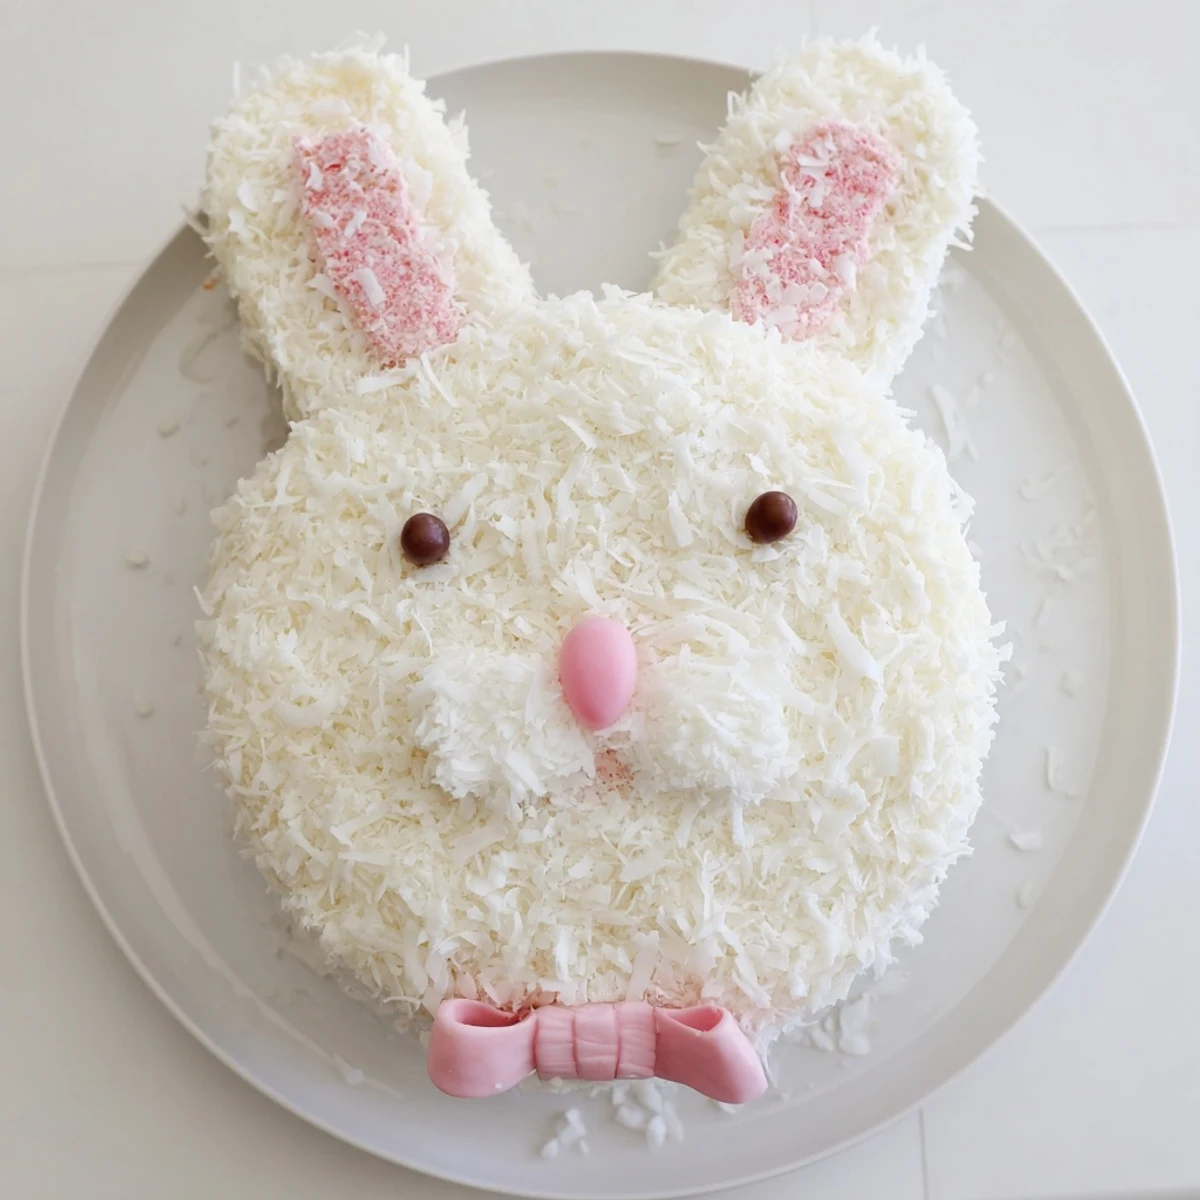
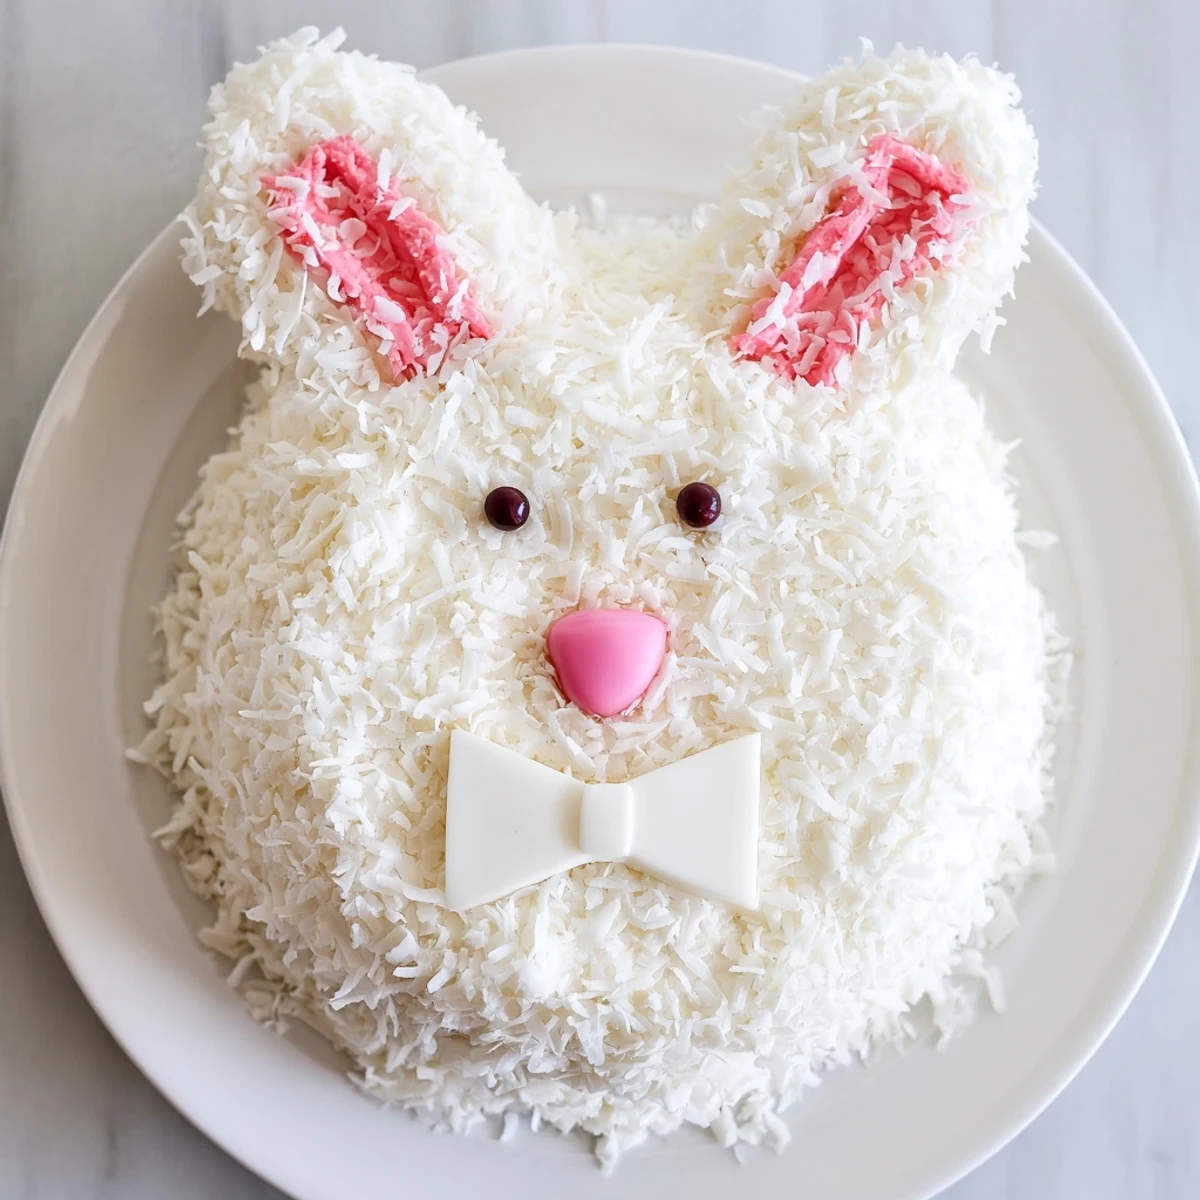
Save Craft a delightful bunny-shaped centerpiece featuring moist vanilla layers coated in creamy buttercream and rolled in fluffy coconut for realistic fur texture. This whimsical dessert transforms simple round cakes into an adorable Easter or spring celebration showpiece.
The assembly involves arranging one whole cake round as the bunny face while cutting the second layer into ear shapes and a decorative bow tie. A crumb coat ensures smooth frosting application before pressing shredded coconut across the entire surface for that signature furry appearance.
Customization options include tinting coconut pink for inner ear details, using fondant or marshmallows for ear accents, and adding jelly bean features for eyes and nose. The result is an impressive 12-serving dessert that looks professionally decorated but comes together with basic baking skills.
Last spring, my niece asked if we could make a bunny cake for her birthday instead of the usual rectangle sheet cake. I had not shaped a cake like an animal since my own childhood, but the way her eyes lit up at the idea made me grab the mixing bowls without hesitation. We ended up with coconut scattered across the entire kitchen floor and frosting on our noses, but that bunny cake became the centerpiece of a celebration she still talks about months later. There is something about turning dessert into a friendly creature that makes everyone at the table smile, no matter their age.
My grandmother used to say that desserts with faces have more flavor, and I always thought she was just being silly until I watched my kids eat this bunny cake. They named him Mr. Whiskers before we even finished decorating his ears, and suddenly cake was not just something to consume but something to interact with and enjoy. The coconut frosting gave it such perfect texture that even my brother-in-law who claims not to like sweets went back for seconds.
Ingredients
- All-purpose flour: The backbone of this tender cake, providing just enough structure to hold the bunny shape without becoming tough or dense
- Baking powder and baking soda: These work together to give the cake its rise, creating those light air pockets that make each bite feel like eating a cloud
- Unsalted butter: Room temperature butter creamed with sugar creates tiny air pockets that lead to the most tender texture imaginable
- Large eggs: They bind everything together while adding richness and structure to the cake crumb
- Whole milk: Full-fat milk keeps the cake moist and adds a subtle creaminess that makes the flavor feel complete
- Vanilla extract: Pure vanilla extract is worth every penny here, giving the cake that classic comforting flavor everyone recognizes immediately
- Powdered sugar: Sifting the powdered sugar first prevents lumps in your frosting and makes it silky smooth
- Shredded sweetened coconut: This creates the most convincing fluffy bunny fur while adding sweetness and texture that everyone loves
- Pink food coloring: Just a tiny drop transforms plain coconut into the perfect inner ear detail
- Jelly beans or mini candies: These become the expressive eyes and nose that give your bunny its unique personality
- Pink and white fondant or marshmallows: Choose whichever you have on hand to create those signature long bunny ears
Instructions
- Preheat and prep your baking space:
- Set your oven to 350°F and generously grease and flour two 8-inch round pans, paying special attention to the sides so the cakes release easily later.
- Whisk the dry ingredients:
- In a medium bowl, combine flour, baking powder, baking soda, and salt, whisking until everything is evenly distributed.
- Cream butter and sugar:
- Beat the butter and sugar together for several minutes until pale and fluffy, then add eggs one at a time, followed by vanilla.
- Combine wet and dry:
- Alternate adding the flour mixture and milk to the butter mixture, beginning and ending with the flour, mixing just until incorporated.
- Bake the layers:
- Divide batter evenly between the prepared pans and bake for 22–25 minutes until a toothpick comes out clean from the center.
- Cool completely:
- Let the cakes rest in their pans for 10 minutes before turning them onto wire racks to cool entirely, which prevents the frosting from melting later.
- Make the frosting:
- Beat butter until smooth, then gradually incorporate powdered sugar, vanilla, salt, and just enough milk to achieve a spreadable consistency.
- Shape the bunny pieces:
- Keep one cake round whole for the face, cut the second round into two ovals for ears, and trim the remaining center into a bow tie shape.
- Arrange the bunny:
- Position the face, ears, and bow tie on a large serving tray, moving them around until you are happy with the expression.
- Apply crumb coat:
- Spread a thin layer of frosting over all the cake pieces to seal in the crumbs, then chill for 20 minutes to set.
- Frost and add fur:
- Cover the entire bunny with a generous layer of frosting, then gently press shredded coconut all over the surface for that fluffy fur effect.
- Add pink details:
- Tint a small handful of coconut with pink food coloring and carefully press it onto the inner sections of the ears.
- Finish the face:
- Place fondant or marshmallow details on the ears, then add candy eyes and nose to bring your bunny to life.
 Save
Save The first time I made this cake, I was nervous about cutting the second round into shapes, but my friend reminded me that bunnies in nature are not perfectly symmetrical anyway. That bit of advice relaxed my whole approach, and the finished bunny looked more charming because of his slightly lopsided ears. Sometimes the imperfections are exactly what make homemade desserts feel special and worth remembering.
Making It Your Own
Chocolate cake works beautifully as the base if you want a richer flavor that contrasts with the sweet coconut frosting. You can also use store-bought frosting to save time on busy days without sacrificing the final presentation.
Serving Suggestions
This bunny cake pairs wonderfully with lightly sweet Moscato wine for the adults or sparkling lemonade for the kids. The cake is quite sweet on its own, so simple beverages balance everything nicely.
Storage And Timing
The cake stays fresh covered at room temperature for up to 2 days, though the coconut texture is best within the first 24 hours. For longer storage, refrigerate for up to 4 days but bring to room temperature before serving for the softest texture.
- Consider adding licorice strips for whiskers if you want extra detail
- Make the cake layers one day ahead and frost the next for easier scheduling
- Keep finished cake away from direct sunlight to prevent the colors from fading
 Save
Save This bunny cake has become our family go-to for spring celebrations, and I hope it brings just as much joy to your table as it has to ours. Happy baking and happy spring.
Recipe Questions & Answers
- → How far in advance can I make the bunny cake?
-
Prepare the cake layers one day ahead and store them tightly wrapped at room temperature. The assembled bunny cake stays fresh covered at room temperature for two days or refrigerated for up to four days. Add coconut and delicate decorations within 24 hours of serving for best texture and appearance.
- → What's the best way to cut the cake into bunny shapes?
-
Keep one round cake whole for the bunny face. Cut the second round in half, then trim each half into elongated oval shapes for ears. The remaining center section becomes a bow tie when cut into a triangular or bow shape. Use a serrated knife and clean cuts for neat edges that frost smoothly.
- → Can I use chocolate cake instead of vanilla?
-
Absolutely, chocolate cake works beautifully and creates striking contrast with white coconut fur. Simply substitute your favorite chocolate cake batter and follow the same baking times. The richer flavor pairs wonderfully with the sweet buttercream frosting and adds visual depth to the presentation.
- → How do I get the coconut to stick properly?
-
Apply a generous layer of buttercream frosting while it's still slightly tacky, not chilled or hardened. Press handfuls of shredded coconut gently onto the frosted surface, working in sections. Hold the cake over a bowl to catch excess coconut. For tinted areas, apply colored coconut immediately before the frosting sets.
- → What alternatives work for bunny features if I don't have fondant?
-
Marshmallows cut in half create perfect ear accents, while large pink jellybeans or round candies work for noses and eyes. Licorice strips make excellent whiskers. Pink construction paper or cardstock behind translucent candy creates pretty ear details. Many home bakers successfully use items found in the baking aisle.
- → Can I freeze the assembled bunny cake?
-
Freezing the fully assembled cake with coconut isn't recommended as the texture becomes soggy upon thawing. Instead, freeze unfrosted cake layers wrapped tightly in plastic and foil for up to three months. Thaw overnight at room temperature, then proceed with frosting and decoration when ready to serve.
